The Flask Mega-Tutorial, Part XIV: Ajax
Posted by
on underThis is the fourteenth installment of the Flask Mega-Tutorial series, in which I'm going to add a live language translation feature, using the Microsoft translation service and a little bit of JavaScript.
You are reading the 2024 edition of the Flask Mega-Tutorial. The complete course is also available to order in e-book and paperback formats from Amazon. Thank you for your support!
If you are looking for the 2018 edition of this course, you can find it here.
For your reference, here is the complete list of articles in this series:
- Chapter 1: Hello, World!
- Chapter 2: Templates
- Chapter 3: Web Forms
- Chapter 4: Database
- Chapter 5: User Logins
- Chapter 6: Profile Page and Avatars
- Chapter 7: Error Handling
- Chapter 8: Followers
- Chapter 9: Pagination
- Chapter 10: Email Support
- Chapter 11: Facelift
- Chapter 12: Dates and Times
- Chapter 13: I18n and L10n
- Chapter 14: Ajax (this article)
- Chapter 15: A Better Application Structure
- Chapter 16: Full-Text Search
- Chapter 17: Deployment on Linux
- Chapter 18: Deployment on Heroku
- Chapter 19: Deployment on Docker Containers
- Chapter 20: Some JavaScript Magic
- Chapter 21: User Notifications
- Chapter 22: Background Jobs
- Chapter 23: Application Programming Interfaces (APIs)
In this article I'm going to take a departure from the "safe zone" of server-side development to work on a feature that has equally important server and client-side components. Have you seen the "Translate" links that some sites show next to user generated content? These are links that trigger a real time automated translation of content that is not in the user's native language. The translated content is typically inserted below the original version. Google shows it for search results in foreign languages. Facebook does it for posts. Twitter does it for tweets. Today I'm going to show you how to add the very same feature to Microblog!
The GitHub links for this chapter are: Browse, Zip, Diff.
Server-side vs. Client-side
In the traditional server-side model that I've followed so far there is a client (a web browser commanded by a user) making HTTP requests to the application server. A request can simply ask for an HTML page, like when you click the "Profile" link, or it can trigger an action, like when you click the Submit button after editing your profile information. In both types of requests the server completes the request by sending a new web page to the client, either directly or by issuing a redirect. The client then replaces the current page with the new one. This cycle repeats for as long as the user stays on the application's website. In this model the server does all the work, while the client just displays the web pages and accepts user input.
There is a different model in which the client takes a more active role. In this model, the client issues a request to the server and the server responds with a web page, but unlike the previous case, not all the page data is HTML, there is also sections of the page with code, typically written in JavaScript. Once the client receives the page it displays the HTML portions, and executes the code, which often doesn't run immediately, but just sets event handlers to run in the browser as a response to actions triggered by the user. From then on you have an active client that can do work on its own without little or no contact with the server. In a strict client-side application the entire application is downloaded to the client with the initial page request, and then the application runs entirely on the client, only contacting the server to retrieve or store data and making dynamic changes to the appearance of that first and only web page. This type of applications are called Single Page Applications or SPAs.
Most applications are a hybrid between the two models and combine techniques of both. My Microblog application is mostly a server-side application, but today I will be adding a bit of client-side action to it. To do real time translations of user posts, the client browser will send asynchronous requests to the server, to which the server will respond without causing a page refresh. The client will then insert the translations into the current page dynamically. This technique is known as Ajax, which is short for Asynchronous JavaScript and XML (even though these days XML is often replaced with JSON).
Live Translation Workflow
The application has good support for foreign languages thanks to Flask-Babel, which makes it possible to support as many languages as I can find translators for. But of course, there is one element missing. Users are going to write blog posts in their own languages, so it is quite possible that a user will come across posts from other users that are written in unknown languages. The quality of automated translations isn't always great, but in most cases it is good enough if all you want is to have a basic idea of what a text in another language means.
This is an ideal feature to implement as an Ajax service. Consider that the index or explore pages could be showing several posts, some of which might be in foreign languages. If I implement the translation using traditional server-side techniques, a request for a translation would cause the original page to get replaced with a new page. The fact is that requesting a translation for one out of many displayed blogs posts isn't a big enough action to require a full page update, this feature works much better if the translated text is dynamically inserted below the original text while leaving the rest of the page untouched.
Implementing live automated translations requires a few steps. First, I need a way to identify the source language of the text to translate. I also need to know the preferred language for each user, because I want to show a "Translate" link only for posts written in other languages. When a translation link is offered and the user clicks on it, I will need to send the Ajax request to the server, and the server will contact a third-party translation API. Once the server sends back a response with the translated text, the client-side JavaScript code will dynamically insert this text into the page. As you can surely notice, there are a few non-trivial problems here. I'm going to look at these one by one.
Language Identification
The first problem is identifying what language a post was written in. This isn't an exact science, as it is not always possible to unequivocally determine the language of a text, but for most cases, automated detection works fairly well. In Python, there is a good language detection library called langdetect.
(venv) $ pip install langdetect
The plan is to feed each blog post to this package, to try to determine the language. Since doing this analysis is somewhat time-consuming, I don't want to repeat this work every time a post is rendered to a page. What I'm going to do is set the detected language of a post at the time the post is submitted. The detected language is then going to be stored in the posts table.
The first step is to add a language field to the Post model:
app/models.py: Add detected language to Post model.
class Post(db.Model):
    # ...
    language: so.Mapped[Optional[str]] = so.mapped_column(sa.String(5))
As you recall, each time there is a change made to the database models, a database migration needs to be issued:
(venv) $ flask db migrate -m "add language to posts"
INFO  [alembic.runtime.migration] Context impl SQLiteImpl.
INFO  [alembic.runtime.migration] Will assume non-transactional DDL.
INFO  [alembic.autogenerate.compare] Detected added column 'post.language'
  Generating migrations/versions/2b017edaa91f_add_language_to_posts.py ... done
And then the migration needs to be applied to the database:
(venv) $ flask db upgrade
INFO  [alembic.runtime.migration] Context impl SQLiteImpl.
INFO  [alembic.runtime.migration] Will assume non-transactional DDL.
INFO  [alembic.runtime.migration] Upgrade ae346256b650 -> 2b017edaa91f, add language to posts
I can now detect and store the language when a post is submitted:
app/routes.py: Save language for new posts.
from langdetect import detect, LangDetectException

@app.route('/', methods=['GET', 'POST'])
@app.route('/index', methods=['GET', 'POST'])
@login_required
def index():
    form = PostForm()
    if form.validate_on_submit():
        try:
            language = detect(form.post.data)
        except LangDetectException:
            language = ''
        post = Post(body=form.post.data, author=current_user,
                    language=language)
        # ...
With this change, each time a post is submitted, I run the text through the detect() function to try to determine the language. If the language cannot be identified, the langdetect package raises an exception of type LangDetectException. In that case I play it safe and save an empty string to the database. I'm going to adopt the convention that any posts that have the language set to an empty string are assumed to have an unknown language.
Displaying a "Translate" Link
The second step involves adding a "Translate" link next to any posts that are not in the language the is active for the current user.
app/templates/_post.html: Add a Translate link to posts.
                {% if post.language and post.language != g.locale %}
                <br><br>
                <a href="#">{{ _('Translate') }}</a>
                {% endif %}
I'm doing this in the _post.html sub-template, so that this functionality appears on any page that displays blog posts. The Translate link will only appear on posts for which the language was detected, and this language does not match the language selected by the function decorated with Flask-Babel's locale_selector function. Recall from Chapter 13 that the selected locale is stored as g.locale in the before_request handler. The text of the link needs to be added in a way that it can be translated by Flask-Babel, so I used the _() function when I defined it.
Note that there is no associated an action with this link yet. First I want to figure out how to carry out the actual translations.
Using a Third-Party Translation Service
The two major translation services are Google Cloud Translation API and Microsoft Translator Text API. Both are paid services, and both have an entry level option for low volume of translations that is free. In this chapter I'm going to implement the Microsoft solution, but I'm going to do it in a way that it is easy to replace the translation service if you so desire.
Before you can use the Microsoft Translator API, you will need to get an account with Azure, Microsoft's cloud service. You can sign up on their free tier. You will be asked to provide a credit card number during the signup process, but your card is not going to be charged while you stay on that level of service.
Once you have the Azure account, go to the Azure Portal and click on the "Create a resource" button, type "translator" in the search box and press Enter. Find the Translator resource from the search results and click the "Create" button. You will now be presented with a form in which you can define a new translator resource that will be added to your account. Complete the form as follows:
- Subscription: select "Pay-As-You-Go"
- Resource group: click "Create new", and enter name "microblog-translator"
- Region: select the region closest to you
- Name: enter "microblog"
- Pricing tier: select "Free F0 (Up to 2M characters translated per month)"
Click the "Review + create" button to continue on to the next page, in which you will see a summary of the options you have selected. Click the "Create" button to confirm the creation of the translation resource. If you wait a few seconds, you will receive a notification in the top bar that the translator resource was deployed. Click the "Go to resource" button, and then on the "Keys and Endpoint" option on the left sidebar. You will now see two keys, labeled "Key 1" and "Key 2". Copy either one of the keys to the clipboard and then enter it into an environment variable in your terminal (if you are using Microsoft Windows, replace export with set):
(venv) $ export MS_TRANSLATOR_KEY=<paste-your-key-here>
This key is used to authenticate with the translation service, so it needs to be added to the application configuration:
config.py: Add Microsoft Translator API key to the configuration.
class Config:
    # ...
    MS_TRANSLATOR_KEY = os.environ.get('MS_TRANSLATOR_KEY')
As always with configuration values, I prefer to install them in environment variables and import them into the Flask configuration from there. This is particularly important with sensitive information such as keys or passwords that enable access to third-party services. You definitely do not want to write those explicitly in the code.
The Microsoft Translator API is a web service that accepts HTTP requests. There are a few HTTP clients in Python, but the most popular and simple to use is the requests package. So let's install that into the virtual environment:
(venv) $ pip install requests
Below you can see the function that I coded to translate text using the Microsoft Translator API. I am putting it in a new app/translate.py module:
app/translate.py: Text translation function.
import requests
from flask_babel import _
from app import app

def translate(text, source_language, dest_language):
    if 'MS_TRANSLATOR_KEY' not in app.config or \
            not app.config['MS_TRANSLATOR_KEY']:
        return _('Error: the translation service is not configured.')
    auth = {
        'Ocp-Apim-Subscription-Key': app.config['MS_TRANSLATOR_KEY'],
        'Ocp-Apim-Subscription-Region': 'westus',
    }
    r = requests.post(
        'https://api.cognitive.microsofttranslator.com'
        '/translate?api-version=3.0&from={}&to={}'.format(
            source_language, dest_language), headers=auth, json=[{'Text': text}])
    if r.status_code != 200:
        return _('Error: the translation service failed.')
    return r.json()[0]['translations'][0]['text']
The function takes the text to translate and the source and destination language codes as arguments, and it returns a string with the translated text. It starts by checking that there is a key for the translation service in the configuration, returning an error if the key hasn't been defined. The error is also a string, so from the outside, this is going to look like the translated text. This ensures that in the case of an error, the user will see a meaningful error message.
The post() method from the requests package sends an HTTP request with a POST method to the URL given as the first argument. I'm using the base URL that appears in the "Keys and Endpoint" page of the translator resource, which is https://api.cognitive.microsofttranslator.com/. The path for the translation endpoint is /translate, as given in the documentation.
The source and destination languages need to be given as query string arguments in the URL, named from and to respectively. The API also requires the api-version=3.0 argument to be given in the query string. The text to translate needs to be given in JSON format in the body of the request, with the format {"Text": "the text to translate here"}.
To authenticate with the service, I need to pass the key that I added to the configuration. This key needs to be given in a custom HTTP header with the name Ocp-Apim-Subscription-Key. The region in which the translator resource was deployed also needs to be provided, in a header with the name Ocp-Apim-Subscription-Region. The name that you need to provide for the region is shown in the "Keys and Endpoint" page, right below the two keys. In my case it is westus for the West US region that I selected, but it will be different for you if you selected a different region. I have created the auth dictionary with these two headers and then passed it to requests in the headers argument.
The requests.post() method returns a response object, which contains all the details provided by the service. I first need to check that the status code is 200, which is the code for a successful request. If I get any other codes, I know that there was an error, so in that case I return an error string. If the status code is 200, then the body of the response has a JSON encoded string with the translation, so all I need to do is use the json() method from the response object to decode the JSON into a Python string that I can use. The JSON response is a list of translations, but since we are translating a single text I can get the first element and find the actual translated text within the translation structure.
Below you can see a Python console session in which I use the new translate() function:
>>> from app.translate import translate
>>> translate('Hi, how are you today?', 'en', 'es')  # English to Spanish
'Hola, ¿cómo estás hoy?'
>>> translate('Hi, how are you today?', 'en', 'de')  # English to German
'Are Hallo, how you heute?'
>>> translate('Hi, how are you today?', 'en', 'it')  # English to Italian
'Ciao, come stai oggi?'
>>> translate('Hi, how are you today?', 'en', 'fr')  # English to French
"Salut, comment allez-vous aujourd'hui ?"
Pretty cool, right? Now it's time to integrate this functionality with the application.
Ajax From The Server
I'm going to start by implementing the server-side part. When the user clicks the "Translate" link that appears below a post, an asynchronous HTTP request will be issued to the server. I'll show you how to do this in the next section, so for now I'm going to concentrate on implementing the handling of this request by the server.
An asynchronous (or Ajax) request is similar to the routes and view functions that I have created in the application, with the only difference that instead of returning HTML or a redirect, it just returns data, formatted as XML or more commonly JSON. Below you can see the translation view function, which invokes the Microsoft Translator API and then returns the translated text in JSON format:
app/routes.py: Text translation view function.
from app.translate import translate

@app.route('/translate', methods=['POST'])
@login_required
def translate_text():
    data = request.get_json()
    return {'text': translate(data['text'],
                              data['source_language'],
                              data['dest_language'])}
As you can see, this is very short. I implemented this route as a POST request, which is the preferred format when the client needs to submit data to the server.
The request.get_json() method returns a dictionary with data that the client has submitted in JSON format. What I'm doing in this function is to invoke the translate() function from the previous section, passing the three arguments directly from the JSON data that was submitted with the request. The result is incorporated into a dictionary with a single key called text, which is returned as the response. Flask automatically dictionaries returned by view functions to the JSON format.
For example, if the client wanted to translate the string Hello, World! to Spanish, the response from this request would have the follow payload:
{ "text": "Hola, Mundo!" }
Ajax From The Client
So now that the server is able to provide translations through the /translate URL, I need to invoke this URL when the user clicks the "Translate" link I added above, passing the text to translate and the source and destination languages. If you are not familiar with working with JavaScript in the browser this is going to be a good learning experience.
When working with JavaScript in the browser, the page currently being displayed is internally represented in the Document Object Model or DOM. This is a hierarchical structure that references all the elements that exist in the page. The JavaScript code running in this context can make changes to the DOM to trigger changes in the page.
Let's first discuss how my JavaScript code running in the browser can obtain the three arguments that I need to send to the translate() function that runs in the server. To obtain the text, I need to locate the node within the DOM that contains the blog post body and read its contents. To make it easy to identify the DOM nodes that contain blog posts, I'm going to attach a unique ID to them. If you look at the _post.html template, the line that renders the post body just reads {{ post.body }}. What I'm going to do is wrap this content in a <span> element. This is not going to change anything visually, but it gives me a place where I can insert an identifier:
app/templates/_post.html: Add an ID to each blog post.
<span id="post{{ post.id }}">{{ post.body }}</span>
This is going to assign a unique identifier to each blog post, with the format post1, post2, and so on, where the number matches the database identifier of each post. Now that each blog post has a unique identifier, I can use the document.getElementById() function available in the browser to locate the <span> element for that post and extract the text in it. For example, if I wanted to get the text for a post with ID 123 this is what I would do:
document.getElementById('post123').innerText
I will also want to have a place where I will be inserting the translated text once I receive it from the server. For this I'm going to replace the "Translate" link with the translated text, so I also need to have a unique identifier to locate it easily:
app/templates/_post.html: Add an ID to the translate link.
                <span id="translation{{ post.id }}">
                    <a href="#">{{ _('Translate') }}</a>
                </span>
So now for a given post ID, I have a post<ID> node for the blog post, and a corresponding translation<ID> node where I will need to replace the Translate link with the translated text once I have it.
The next step is to write a function that can do all the translation work. This function will take the input and output DOM nodes, and the source and destination languages. Then it will issue the asynchronous request to the server with the three arguments needed, and finally replace the Translate link with the translated text returned by the server. This sounds like a lot of work, but the implementation is fairly short. For convenience, this function will be added in the base template at the bottom of the <body> element, so that it is available in all the pages of the application.
app/templates/base.html: Client-side translate function.
    ...
    <script>
      async function translate(sourceElem, destElem, sourceLang, destLang) {
        document.getElementById(destElem).innerHTML =
          '<img src="{{ url_for('static', filename='loading.gif') }}">';
        const response = await fetch('/translate', {
          method: 'POST',
          headers: {'Content-Type': 'application/json; charset=utf-8'},
          body: JSON.stringify({
            text: document.getElementById(sourceElem).innerText,
            source_language: sourceLang,
            dest_language: destLang
          })
        })
        const data = await response.json();
        document.getElementById(destElem).innerText = data.text;
      }
    </script>
  </body>
</html>
The first two arguments of the translate() function are the unique IDs for the post and the Translate link nodes, called sourceElem and destElem respectively. The third and fourth arguments are the source and destination language codes. The function is defined with the async keyword, so that it can await asynchronous functions with the await keyword.
The first thing the function does is cosmetic, but very cool: it adds a spinner image replacing the Translate link, so that the user knows that the translation is in progress. This is done by assigning to the innerHTML property of the element referenced by destElem, which effectively replaces the content of that element with new HTML. For the spinner, I'm going to use a small animated GIF that I have added to the app/static/loading.gif directory, which Flask reserves for static files. To generate the URL that references this image, I'm using the url_for() function, passing the special route name static and giving the filename of the image as an argument. You can find the loading.gif image in the download package for this chapter.
So now I have a nice spinner that took the place of the Translate link, so the user knows to wait for the translation to appear a few moments later. The next step is to send the POST request to the /translate URL that I defined in the previous section. For this I'm going to use the fetch() function provided by the browser. This function submits data to the server at the URL given in the first argument. The dictionary passed as the second argument defines the characteristics of the request, including the HTTP method to use, any headers, and the body of the request with the data.
The body is a string that is generated with the JSON.stringify() function, which takes a dictionary with data and returns a JSON payload with that data. The Content-Type header is added to the request to tell the server that the data is given in JSON format.
The fetch() function is asynchronous, which means that it returns a promise object. To simplify its handling, the await keyword is used to wait for this function to complete. The return value is a response object.
The server returns JSON data in this request, so the response.json() method is used to convert it to a dictionary (which in JavaScript is called an "object"). This is also an asynchronous operation, so the await keyword is used one more time. The result of this conversion is stored in data.
The last line of the function sets the innerText property of the destElem node (which now has a spinner image), with the text returned by the server, which is either the translated version of the input text, or an error message.
So now the only thing that is left is to trigger the translate() function with the correct arguments as a result of the user clicking a Translate link. There are also a few ways to do this, what I'm going to do is just embed the call to the function in the href attribute of the link:
app/templates/_post.html: Translate link handler.
                <span id="translation{{ post.id }}">
                    <a href="javascript:translate(
                                'post{{ post.id }}',
                                'translation{{ post.id }}',
                                '{{ post.language }}',
                                '{{ g.locale }}');">{{ _('Translate') }}</a>
                </span>
The href element of a link can accept any JavaScript code if it is prefixed with javascript:, so that is a convenient way to make the call to the translation function. Because this link is going to be rendered in the server when the client requests the page, I can use {{ }} expressions to generate the four arguments to the function. Each post will have its own translate link, with its uniquely generated arguments.
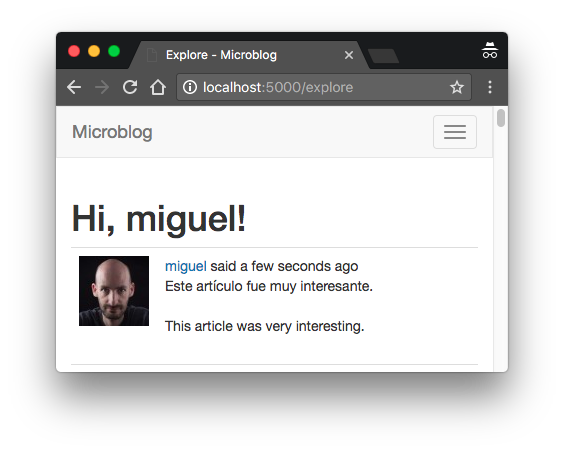
Now the live translation feature is complete! If you have set a valid Microsoft Translator API key in your environment, you should now be able to trigger translations. Assuming you have your browser set to prefer English, you will need to write a post in another language to see the "Translate" link. Below you can see an example:
In this chapter I introduced a few new texts that need to be translated into all the languages supported by the application, so it is necessary to update the translation catalogs:
(venv) $ flask translate update
For your own projects you will then need to edit the messages.po files in each language repository to include the translations for these new tests, but I have already created the Spanish translations in the download package for this chapter or the GitHub repository.
To publish the new translations, they need to be compiled:
(venv) $ flask translate compile
Continue on to the next chapter.
Become a Patron!
Hello, and thank you for visiting my blog! If you enjoyed this article, please consider supporting my work on this blog on Patreon!

-
#1 Vladimir Kuzmenkov said
Great chapter,
I've implemented translation with google cloud, since I'm from Belarus and microsoft does not provide service for us.
Google translation service is a bit more complicated to configure, it would require the generation of json file with encrypted credentials and setting global variabal with the path to it.
Also google does not require origin language parameter, the language is detected automatically.Thanks!
-
#2 zihao cai said
Hello, Miguel:
I checked the language of the post and it shows "zh-cn", which is not the same as the value "zh" for "g.locale" in "_post.html", so it still displays the translate button, even though the translation is exactly the same as the post text. I then tried to recreate a translation using "flask translate init zh-cn", however the result was "ValueError: expected only letters, got 'zh-cn'" and "RootCode". " and "RuntimeError: init command failed". Theoretically it doesn't affect the usage, but I'd like to know how to solve this problem!Thanks!
-
#3 Miguel Grinberg said
@zihao: you could for example check if the detected language has a
-, and in that case only use the characters up to and without including it. You could do that with an expression such as:language = language.split('-')[0] -
#4 zihao cai said
Yes, i have tried 'post.language[0:2] != g.locale' to compare. Thank you!
-
#5 Finlay said
Thank you for going into detail on setting up a click-to-load function. This is what I'm trying to do on my project, although instead of translating text I'm trying to make an animation or image appear when I click a link or button, without the whole page refreshing.
Do you perhaps have any pointers on how I would approach this task? I have the python code to generate the image, I just need the clicked link to execute the code to produce the image, then display it on the webpage. So it seems a simpler task that what you have done here as I'm not taking an argument from the webpage. However I still having some difficulty wrapping my head round the whole process.
-
#6 Miguel Grinberg said
@Finlay: You can add a
<img>tag to the page. In thesrcattribute you can write an endpoint that goes to a Flask route that returns the image data. -
#7 Finlay said
Thank you for this tutorial. By going over it again and again I have managed to build the foundation of a basic app, which I'm very happy about!
In the app I'm building I don't need to have user login, but I would like to have information from the user kept while the user is accessing the app. In the app the user types in some numbers and then navigates to other pages to view graphs based on those numbers.
I've used Flask-Session for server side user-tracking, with sqlalchemy as the chosen database. So the database of my app is a bit simpler compared to this microblog.
in order to 'span id' the html tags to add the client side action feature, I've generated an id unique to the user with id(session) - object of Flask-Session, it's a 13-digit number. This has worked on my testing, but I'm wondering if you think this approach would work if the app went live. Do you think it would work if multiple users were accessing the app at the same time? Are there other approaches to consider? -
#8 Miguel Grinberg said
@Finlay: you probably don't need a unique id for your users if you don't have a login. I don't see anything wrong with using a random number as id, but you may want to make sure you really need to use an identifier. Your user session will already be initialized with a unique identifier, which will be used as a key in your database.
-
#9 Finlay said
Thank you for your response.
I'm trying to use an ajax call to display an image. I understand that the final returned object from the server(routes.py) to the client (html page) is a string. I have suceeded in displaying images before by sending a bytesio file. I want to use bytesio to avoid saving the images in files, to avoid clutter.
Can the final returned object be in bytesio format or can it only be string. One workaround I thought about was creating a javascript function to convert the string to bytearray on the html page, I read that TextEncoder() can do this. And then inserting the bytearray into the src in the img tag. But then I'm also not sure about how to span the src="" part.
<img src=" \<span "id= id_for_destElem">\</span>" >
doesn't seem to work. Nor does
<img \<span "id=id_for_destElem"> src="" \</span> >I appreciate this question deviates from your tutorial, but I just wondered if you had any pointers for me.
-
#10 Miguel Grinberg said
@Finlay: you can use a BytesIO object with the send_file() function.


