Handling File Uploads With Flask
Posted by
on underA common feature in web applications is to let users upload files to the server. The HTTP protocol documents the mechanism for a client to upload a file in RFC 1867, and our favorite web framework Flask fully supports it, but there are many implementation details that fall outside of the formal specification that are unclear for many developers. Things such as where to store uploaded files, how to use them afterwards, or how to protect the server against malicious file uploads generate a lot of confusion and uncertainty.
In this article I'm going to show you how to implement a robust file upload feature for your Flask server that is compatible with the standard file upload support in your web browser as well as the cool JavaScript-based upload widgets:

A Basic File Upload Form
From a high-level perspective, a client uploading a file is treated the same as any other form data submission. In other words, you have to define an HTML form with a file field in it.
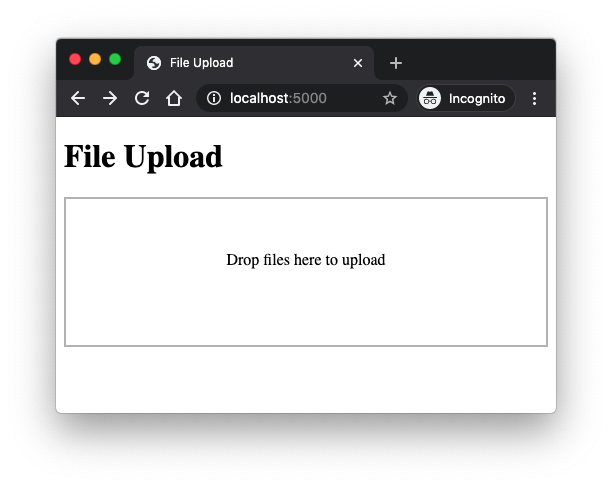
Here is a simple HTML page with a form that accepts a file:
<!doctype html>
<html>
  <head>
    <title>File Upload</title>
  </head>
  <body>
    <h1>File Upload</h1>
    <form method="POST" action="" enctype="multipart/form-data">
      <p><input type="file" name="file"></p>
      <p><input type="submit" value="Submit"></p>
    </form>
  </body>
</html>

As you probably know, the method attribute of the <form> element can be GET or POST. With GET, the data is submitted in the query string of the request URL, while with POST it goes in the request body. When files are being included in the form, you must use POST, as it would be impossible to submit file data in the query string.
The enctype attribute in the <form> element is normally not included with forms that don't have files. This attribute defines how the browser should format the data before it is submitted to the server. The HTML specification defines three possible values for it:
application/x-www-form-urlencoded: This is the default, and the best format for any forms except those that contain file fields.multipart/form-data: This format is required when at least one of the fields in the form is a file field.text/plain: This format has no practical use, so you should ignore it.
The actual file field is the standard <input> element that we use for most other form fields, with the type set to file. In the example above I haven't included any additional attributes, but the file field supports two that are sometimes useful:
multiplecan be used to allow multiple files to be uploaded in a single file field. Example:
<input type="file" name="file" multiple>
acceptcan be used to filter the allowed file types that can be selected, either by file extension or by media type. Examples:
    <input type="file" name="doc_file" accept=".doc,.docx">
    <input type="file" name="image_file" accept="image/*">
Accepting File Submissions with Flask
For regular forms, Flask provides access to submitted form fields in the request.form dictionary. File fields, however, are included in the request.files dictionary. The request.form and request.files dictionaries are really "multi-dicts", a specialized dictionary implementation that supports duplicate keys. This is necessary because forms can include multiple fields with the same name, as is often the case with groups of check boxes. This also happens with file fields that allow multiple files.
Ignoring important aspects such as validation and security for the moment, the short Flask application shown below accepts a file uploaded with the form shown in the previous section, and writes the submitted file to the current directory:
from flask import Flask, render_template, request, redirect, url_for

app = Flask(__name__)

@app.route('/')
def index():
    return render_template('index.html')

@app.route('/', methods=['POST'])
def upload_file():
    uploaded_file = request.files['file']
    if uploaded_file.filename != '':
        uploaded_file.save(uploaded_file.filename)
    return redirect(url_for('index'))
The upload_file() function is decorated with @app.route so that it is invoked when the browser sends a POST request. Note how the same root URL is split between two view functions, with index() set to accept the GET requests and upload_file() the POST ones.
The uploaded_file variable holds the submitted file object. This is an instance of class FileStorage, which Flask imports from Werkzeug.
The filename attribute in the FileStorage provides the filename submitted by the client. If the user submits the form without selecting a file in the file field, then the filename is going to be an empty string, so it is important to always check the filename to determine if a file is available or not.
When Flask receives a file submission it does not automatically write it to disk. This is actually a good thing, because it gives the application the opportunity to review and validate the file submission, as you will see later. The actual file data can be accessed from the stream attribute. If the application just wants to save the file to disk, then it can call the save() method, passing the desired path as an argument. If the file's save() method is not called, then the file is discarded.
Want to test file uploads with this application? Make a directory for your application and write the code above as app.py. Then create a templates subdirectory, and write the HTML page from the previous section as templates/index.html. Create a virtual environment and install Flask on it, then run the application with flask run. Every time you submit a file, the server will write a copy of it in the current directory.
Before I move on to the topic of security, I'm going to discuss a few variations on the code shown above that you may find useful. As I mentioned before, the file upload field can be configured to accept multiple files. If you use request.files['file'] as above you will get only one of the submitted files, but with the getlist() method you can access all of them in a for-loop:
    for uploaded_file in request.files.getlist('file'):
        if uploaded_file.filename != '':
            uploaded_file.save(uploaded_file.filename)
Many people code their form handling routes in Flask using a single view function for both the GET and POST requests. A version of the example application using a single view function could be coded as follows:
@app.route('/', methods=['GET', 'POST'])
def index():
    if request.method == 'POST':
        uploaded_file = request.files['file']
        if uploaded_file.filename != '':
            uploaded_file.save(uploaded_file.filename)
        return redirect(url_for('index'))
    return render_template('index.html')
Finally, if you use the Flask-WTF extension to handle your forms, you can use the FileField object for your file uploads. The form used in the examples you've seen so far can be written using Flask-WTF as follows:
from flask_wtf import FlaskForm
from flask_wtf.file import FileField
from wtforms import SubmitField

class MyForm(FlaskForm):
    file = FileField('File')
    submit = SubmitField('Submit')
Note that the FileField object comes from the flask_wtf package, unlike most other field classes, which are imported directly from the wtforms package. Flask-WTF provides two validators for file fields, FileRequired, which performs a check similar to the empty string check, and FileAllowed, which ensures the file extension is included in an allowed extensions list.
When you use a Flask-WTF form, the data attribute of the file field object points to the FileStorage instance, so saving a file to disk works in the same way as in the examples above.
Securing file uploads
The file upload example presented in the previous section is an extremely simplistic implementation that is not very robust. One of the most important rules in web development is that data submitted by clients should never be trusted, and for that reason when working with regular forms, an extension such as Flask-WTF performs strict validation of all fields before the form is accepted and the data incorporated into the application. For forms that include file fields there needs to be validation as well, because without file validation the server leaves the door open to attacks. For example:
- An attacker can upload a file that is so large that the disk space in the server is completely filled, causing the server to malfunction.
- An attacker can craft an upload request that uses a filename such as ../../../.bashrc or similar, with the attempt to trick the server into rewriting system configuration files.
- An attacker can upload files with viruses or other types of malware in a place where the application, for example, expects images.
Limiting the size of uploaded files
To prevent clients from uploading very big files, you can use a configuration option provided by Flask. The MAX_CONTENT_LENGTH option controls the maximum size a request body can have. While this isn't an option that is specific to file uploads, setting a maximum request body size effectively makes Flask discard any incoming requests that are larger than the allowed amount with a 413 status code.
Let's modify the app.py example from the previous section to only accept requests that are up to 1MB in size:
app.config['MAX_CONTENT_LENGTH'] = 1024 * 1024
If you try to upload a file that is larger than 1MB, the application will now refuse it.
Validating filenames
We can't really trust that the filenames provided by the client are valid and safe to use, so filenames coming with uploaded files have to be validated.
A very simple validation to perform is to make sure that the file extension is one that the application is willing to accept, which is similar to what the FileAllowed validator does when using Flask-WTF. Let's say the application accepts images, then it can configure the list of approved file extensions:
app.config['UPLOAD_EXTENSIONS'] = ['.jpg', '.png', '.gif']
For every uploaded file, the application can make sure that the file extension is one of the allowed ones:
    filename = uploaded_file.filename
    if filename != '':
        file_ext = os.path.splitext(filename)[1]
        if file_ext not in current_app.config['UPLOAD_EXTENSIONS']:
            abort(400)
With this logic, any filenames that do not have one of the approved file extensions is going to be responded with a 400 error.
In addition to the file extension, it is also important to validate the filename, and any path given with it. If your application does not care about the filename provided by the client, the most secure way to handle the upload is to ignore the client provided filename and generate your own filename instead, that you pass to the save() method. An example use case where this technique works well is with avatar image uploads. Each user's avatar can be saved with the user id as filename, so the filename provided by the client can be discarded. If your application uses Flask-Login, you could implement the following save() call:
uploaded_file.save(os.path.join('static/avatars', current_user.get_id()))
In other cases it may be better to preserve the filenames provided by the client, so the filename must be sanitized first. For those cases Werkzeug provides the secure_filename() function. Let's see how this function works by running a few tests in a Python session:
>>> from werkzeug.utils import secure_filename
>>> secure_filename('foo.jpg')
'foo.jpg'
>>> secure_filename('/some/path/foo.jpg')
'some_path_foo.jpg'
>>> secure_filename('../../../.bashrc')
'bashrc'
As you see in the examples, no matter how complicated or malicious the filename is, the secure_filename() function reduces it to a flat filename.
Let's incorporate secure_filename() into the example upload server, and also add a configuration variable that defines a dedicated location for file uploads. Here is the complete app.py source file with secure filenames:
import os
from flask import Flask, render_template, request, redirect, url_for, abort
from werkzeug.utils import secure_filename

app = Flask(__name__)
app.config['MAX_CONTENT_LENGTH'] = 1024 * 1024
app.config['UPLOAD_EXTENSIONS'] = ['.jpg', '.png', '.gif']
app.config['UPLOAD_PATH'] = 'uploads'

@app.route('/')
def index():
    return render_template('index.html')

@app.route('/', methods=['POST'])
def upload_files():
    uploaded_file = request.files['file']
    filename = secure_filename(uploaded_file.filename)
    if filename != '':
        file_ext = os.path.splitext(filename)[1]
        if file_ext not in app.config['UPLOAD_EXTENSIONS']:
            abort(400)
        uploaded_file.save(os.path.join(app.config['UPLOAD_PATH'], filename))
    return redirect(url_for('index'))
Validating file contents
The third layer of validation that I'm going to discuss is the most complex. If your application accepts uploads of a certain file type, it should ideally perform some form of content validation and reject any files that are of a different type.
How you achieve content validation largely depends on the file types your application accepts. For the example application in this article I'm using images, so I can use the imghdr package from the Python standard library to validate that the header of the file is, in fact, an image.
Let's write a validate_image() function that performs content validation on images:
import imghdr

def validate_image(stream):
    header = stream.read(512)
    stream.seek(0)
    format = imghdr.what(None, header)
    if not format:
        return None
    return '.' + (format if format != 'jpeg' else 'jpg')
This function takes a byte stream as an argument. It starts by reading 512 bytes from the stream, and then resetting the stream pointer back, because later when the save() function is called we want it to see the entire stream. The first 512 bytes of the image data are going to be sufficient to identify the format of the image.
The imghdr.what() function can look at a file stored on disk if the first argument is the filename, or else it can look at data stored in memory if the first argument is None and the data is passed in the second argument. The FileStorage object gives us a stream, so the most convenient option is to read a safe amount of data from it and pass it as a byte sequence in the second argument.
The return value of imghdr.what() is the detected image format. The function supports a variety of formats, among them the popular jpeg, png and gif. If not known image format is detected, then the return value is None. If a format is detected, the name of the format is returned. The most convenient is to return the format as a file extension, because the application can then ensure that the detected extension matches the file extension, so the validate_image() function converts the detected format into a file extension. This is as simple as adding a dot as prefix for all image formats except jpeg, which normally uses the .jpg extension, so this case is treated as an exception.
Here is the complete app.py, with all the features from the previous sections plus content validation:
import imghdr
import os
from flask import Flask, render_template, request, redirect, url_for, abort
from werkzeug.utils import secure_filename

app = Flask(__name__)
app.config['MAX_CONTENT_LENGTH'] = 1024 * 1024
app.config['UPLOAD_EXTENSIONS'] = ['.jpg', '.png', '.gif']
app.config['UPLOAD_PATH'] = 'uploads'

def validate_image(stream):
    header = stream.read(512)
    stream.seek(0)
    format = imghdr.what(None, header)
    if not format:
        return None
    return '.' + (format if format != 'jpeg' else 'jpg')

@app.route('/')
def index():
    return render_template('index.html')

@app.route('/', methods=['POST'])
def upload_files():
    uploaded_file = request.files['file']
    filename = secure_filename(uploaded_file.filename)
    if filename != '':
        file_ext = os.path.splitext(filename)[1]
        if file_ext not in app.config['UPLOAD_EXTENSIONS'] or \
                file_ext != validate_image(uploaded_file.stream):
            abort(400)
        uploaded_file.save(os.path.join(app.config['UPLOAD_PATH'], filename))
    return redirect(url_for('index'))
The only change in the view function to incorporate this last validation logic is here:
        if file_ext not in app.config['UPLOAD_EXTENSIONS'] or \
                file_ext != validate_image(uploaded_file.stream):
            abort(400)
This expanded check first makes sure that the file extension is in the allowed list, and then ensures that the detected file extension from looking at the data stream is the same as the file extension.
Before you test this version of the application create a directory named uploads (or the path that you defined in the UPLOAD_PATH configuration variable, if different) so that files can be saved there.
Using Uploaded Files
You now know how to handle file uploads. For some applications this is all that is needed, as the files are used for some internal process. But for a large number of applications, in particular those with social features such as avatars, the files that are uploaded by users have to be integrated with the application. Using the example of avatars, once a user uploads their avatar image, any mention of the username requires the uploaded image to appear to the side.
I divide file uploads into two large groups, depending on whether the files uploaded by users are intended for public use, or they are private to each user. The avatar images discussed several times in this article are clearly in the first group, as these avatars are intended to be publicly shared with other users. On the other side, an application that performs editing operations on uploaded images would probably be in the second group, because you'd want each user to only have access to their own images.
Consuming public uploads
When images are of a public nature, the easiest way to make the images available for use by the application is to put the upload directory inside the application's static folder. For example, an avatars subdirectory can be created inside static, and then avatar images can be saved in that location using the user id as name.
Referencing these uploads stored in a subdirectory of the static folder is done in the same way as regular static files of the application, using the url_for() function. I previously suggested using the user id as a filename, when saving an uploaded avatar image. This was the way the images were saved:
uploaded_file.save(os.path.join('static/avatars', current_user.get_id()))
With this implementation, given a user_id, the URL for the user's avatar can be generated as follows:
url_for('static', filename='avatars/' + str(user_id))
Alternatively, the uploads can be saved to a directory outside of the static folder, and then a new route can be added to serve them. In the example app.py application file uploads are saved to the location set in the UPLOAD_PATH configuration variable. To serve these files from that location, we can implement the following route:
from flask import send_from_directory

@app.route('/uploads/<filename>')
def upload(filename):
    return send_from_directory(app.config['UPLOAD_PATH'], filename)
One advantage that this solution has over storing uploads inside the static folder is that here you can implement additional restrictions before these files are returned, either directly with Python logic inside the body of the function, or with decorators. For example, if you want to only provide access to the uploads to logged in users, you can add Flask-Login's @login_required decorator to this route, or any other authentication or role checking mechanism that you use for your normal routes.
Let's use this implementation idea to show uploaded files in our example application. Here is a new complete version of app.py:
import imghdr
import os
from flask import Flask, render_template, request, redirect, url_for, abort, \
    send_from_directory
from werkzeug.utils import secure_filename

app = Flask(__name__)
app.config['MAX_CONTENT_LENGTH'] = 1024 * 1024
app.config['UPLOAD_EXTENSIONS'] = ['.jpg', '.png', '.gif']
app.config['UPLOAD_PATH'] = 'uploads'

def validate_image(stream):
    header = stream.read(512)  # 512 bytes should be enough for a header check
    stream.seek(0)  # reset stream pointer
    format = imghdr.what(None, header)
    if not format:
        return None
    return '.' + (format if format != 'jpeg' else 'jpg')

@app.route('/')
def index():
    files = os.listdir(app.config['UPLOAD_PATH'])
    return render_template('index.html', files=files)

@app.route('/', methods=['POST'])
def upload_files():
    uploaded_file = request.files['file']
    filename = secure_filename(uploaded_file.filename)
    if filename != '':
        file_ext = os.path.splitext(filename)[1]
        if file_ext not in app.config['UPLOAD_EXTENSIONS'] or \
                file_ext != validate_image(uploaded_file.stream):
            abort(400)
        uploaded_file.save(os.path.join(app.config['UPLOAD_PATH'], filename))
    return redirect(url_for('index'))

@app.route('/uploads/<filename>')
def upload(filename):
    return send_from_directory(app.config['UPLOAD_PATH'], filename)
In addition to the new upload() function, the index() view function gets the list of files in the upload location using os.listdir() and sends it down to the template for rendering. The index.html template updated to show uploads is shown below:
<!doctype html>
<html>
  <head>
    <title>File Upload</title>
  </head>
  <body>
    <h1>File Upload</h1>
    <form method="POST" action="" enctype="multipart/form-data">
      <p><input type="file" name="file"></p>
      <p><input type="submit" value="Submit"></p>
    </form>
    <hr>
    {% for file in files %}
      <img src="{{ url_for('upload', filename=file) }}" style="width: 64px">
    {% endfor %}
  </body>
</html>
With these changes, every time you upload an image, a thumbnail is added at the bottom of the page:

Consuming private uploads
When users upload private files to the application, additional checks need to be in place to prevent sharing files from one user with unauthorized parties. The solution for these cases require variations of the upload() view function shown above, with additional access checks.
A common requirement is to only share uploaded files with their owner. A convenient way to store uploads when this requirement is present is to use a separate directory for each user. For example, uploads for a given user can be saved to the uploads/<user_id> directory, and then the uploads() function can be modified to only serve uploads from the user's own upload directory, making it impossible for one user to see files from another. Below you can see a possible implementation of this technique, once again assuming Flask-Login is used:
@app.route('/uploads/<filename>')
@login_required
def upload(filename):
    return send_from_directory(os.path.join(
        app.config['UPLOAD_PATH'], current_user.get_id()), filename)
Showing upload progress
Up until now we have relied on the native file upload widget provided by the web browser to initiate our file uploads. I'm sure we can all agree that this widget is not very appealing. Not only that, but the lack of an upload progress display makes it unusable for uploads of large files, as the user receives no feedback during the entire upload process. While the scope of this article is to cover the server side, I thought it would be useful to give you a few ideas on how to implement a modern JavaScript-based file upload widget that displays upload progress.
The good news is that on the server there aren't any big changes needed, the upload mechanism works in the same way regardless of what method you use in the browser to initiate the upload. To show you an example implementation I'm going to replace the HTML form in index.html with one that is compatible with dropzone.js, a popular file upload client.
Here is a new version of templates/index.html that loads the dropzone CSS and JavaScript files from a CDN, and implements an upload form according to the dropzone documentation:
<html>
  <head>
    <title>File Upload</title>
    <link rel="stylesheet" href="https://cdnjs.cloudflare.com/ajax/libs/dropzone/5.7.1/min/dropzone.min.css">
  </head>
  <body>
    <h1>File Upload</h1>
    <form action="{{ url_for('upload_files') }}" class="dropzone">
    </form>
    <script src="https://cdnjs.cloudflare.com/ajax/libs/dropzone/5.7.1/min/dropzone.min.js"></script>
  </body>
</html>
The one interesting thing that I've found when implementing dropzone is that it requires the action attribute in the <form> element to be set, even though normal forms accept an empty action to indicate that the submission goes to the same URL.
Start the server with this new version of the template, and this is what you'll get:
That's basically it! You can now drop files and they'll be uploaded to the server with a progress bar and a final indication of success or failure.
If the file upload fails, either due to the file being too large or invalid, dropzone wants to display an error message. Because our server is currently returning the standard Flask error pages for the 413 and 400 errors, you will see some HTML gibberish in the error popup. To correct this we can update the server to return its error responses as text.
The 413 error for the file too large condition is generated by Flask when the request payload is bigger than the size set in the configuration. To override the default error page we have to use the app.errorhandler decorator:
@app.errorhandler(413)
def too_large(e):
    return "File is too large", 413
The second error condition is generated by the application when any of the validation checks fails. In this case the error was generated with a abort(400) call. Instead of that the response can be generated directly:
        if file_ext not in app.config['UPLOAD_EXTENSIONS'] or \
                file_ext != validate_image(uploaded_file.stream):
            return "Invalid image", 400
The final change that I'm going to make isn't really necessary, but it saves a bit of bandwidth. For a successful upload the server returned a redirect() back to the main route. This caused the upload form to be displayed again, and also to refresh the list of upload thumbnails at the bottom of the page. None of that is necessary now because the uploads are done as background requests by dropzone, so we can eliminate that redirect and switch to an empty response with a code 204.
Here is the complete and updated version of app.py designed to work with dropzone.js:
import imghdr
import os
from flask import Flask, render_template, request, redirect, url_for, abort, \
    send_from_directory
from werkzeug.utils import secure_filename

app = Flask(__name__)
app.config['MAX_CONTENT_LENGTH'] = 2 * 1024 * 1024
app.config['UPLOAD_EXTENSIONS'] = ['.jpg', '.png', '.gif']
app.config['UPLOAD_PATH'] = 'uploads'

def validate_image(stream):
    header = stream.read(512)
    stream.seek(0)
    format = imghdr.what(None, header)
    if not format:
        return None
    return '.' + (format if format != 'jpeg' else 'jpg')

@app.errorhandler(413)
def too_large(e):
    return "File is too large", 413

@app.route('/')
def index():
    files = os.listdir(app.config['UPLOAD_PATH'])
    return render_template('index.html', files=files)

@app.route('/', methods=['POST'])
def upload_files():
    uploaded_file = request.files['file']
    filename = secure_filename(uploaded_file.filename)
    if filename != '':
        file_ext = os.path.splitext(filename)[1]
        if file_ext not in app.config['UPLOAD_EXTENSIONS'] or \
                file_ext != validate_image(uploaded_file.stream):
            return "Invalid image", 400
        uploaded_file.save(os.path.join(app.config['UPLOAD_PATH'], filename))
    return '', 204

@app.route('/uploads/<filename>')
def upload(filename):
    return send_from_directory(app.config['UPLOAD_PATH'], filename)
Restart the application with this update and now errors will have a proper message:

The dropzone.js library is very flexible and has many options for customization, so I encourage you to visit their documentation to learn how to adapt it to your needs. You can also look for other JavaScript file upload libraries, as they all follow the HTTP standard, which means that your Flask server is going to work well with all of them.
Conclusion
This was a long overdue topic for me, I can't believe I have never written anything on file uploads! I'd love you hear what you think about this topic, and if you think there are aspects of this feature that I haven't covered in this article. Feel free to let me know below in the comments!
Become a Patron!
Hello, and thank you for visiting my blog! If you enjoyed this article, please consider supporting my work on this blog on Patreon!

-
#1 Frank said
Thank you for this wonderful article
-
#2 Mohamed Ali said
many thanks
-
#3 Hélio Correia said
Awesome post Miguel, really great work
-
#4 Manuel said
Excellent. My Flask teacher.
-
#5 Jürgen said
This is an amazing blog post!
A couple of additional thoughts:
It could be a good addition to introduce a check, whether the file already exists - before trying to save it (not necessarily for the avatar use case, though :-) )Recently, I started answering Flask questions on StackOverFlow, and I noticed, that seemingly nobody writes tests nor knows how to use a debugger.
This may be related to the fact that both Python and Flask are very beginner friendly. But maybe it is also related that even the very high quality Flask tutorials hardly ever mention those techniques.
What do you think about adding a box "Advanced ...." which would sketch how to write a test for your tutorial?
Also, lots of these Flask questions on StackOverFlow are like "I followed this tutorial but it does not work for me". Usually, this can be easily resolved with a debugger.
At last weeks "Python Ireland Monthly Meetup" I delivered a Lightning Talk about debugging a Flask application ( https://www.youtube.com/watch?v=Fxkco-gS4S8 ). While a five minute talk only can give a quick overview, maybe this could be an idea for a future blog post of yours? :-)
All the best, and maybe we see each other at the next "Python Ireland Monthly Meetup"? It was such a fun evening.
-
#6 Miguel Grinberg said
@Jürgen: Adding an "Advanced" section would scare people off, nobody would read that part of the tutorial. :)
While I agree that testing isn't covered in most tutorials, in my experience you can't just force people to write automated tests. This is something that a beginner will see no need for, only at some point the idea will "click" and tests will start to make sense. I have some ideas for a tutorial on testing Flask apps, so at some point that's going to appear on this blog.
-
#7 yuxiaoy said
Hello Miguel,
The secure_filename function imported from werkzeug.utils would filter all non-ASCII characters, so if something like '头像.jpg' was put in the function, which is common for people who speak Chinese, the result would be 'jpg', then we got a file named 'jpg' but with no format on the server, which would be a problem, I suggest to use uuid module to rename the uploaded file to avoid situation above. -
#8 Anthony said
Hi Miguel, thank you so much for this tutorial as I found it very useful. In the app I'm building (which I based a lot of it from your course), I used the flask-uploads library to upload image files as well as csv files. Looking at this tutorial, I'm wondering if I should refactor it to be simpler?
-
#9 Jürgen said
@Miguel: Thanks for getting back to me!
I certainly do not want to force anybody to do anything, but I really like those "advanced" boxes in books, which give an offer to the reader: "read when you are interested in this topic, otherwise skip ahead without regrets".
Actually, back then when I came to your tutorials to learn Flask, I was already a Python programmer writing tests, just for other frameworks. But maybe that's a niche :-)
While Flask documentation got better with the 1.0 overhaul, your writing style fits my head much better.
Looking forward to your testing blog post!
-
#10 Miguel Grinberg said
@yuxiaoy: Yes, the secure_filename() method does not always work.
-
#11 Miguel Grinberg said
@Anthony: I would only refactor if you have problems with your current solution. The fact that I did not use Flask-Uploads should not be taken as a statement that this extension is not good. I just find that for a lot of things extensions are not really necessary.
-
#12 Jürgen said
@Anthony
Since February 2020
Flask-Uploadscan't be installed from PyPi anymore when Werkzeug 1.0 removed a deprecated way to importsecure_filename.If you want to keep using this library, there is a drop-in fork out there: https://pypi.org/project/Flask-Reuploaded/
That said - Miguels tutorial here covers most if not all functions from
Flask-Uploads(maybe minus the automatic renaming of files in case a file with the same name already exists). -
#13 James Chibole said
Just at the right time when I was implementing file upload in my application. You are the best.
-
#14 Freeman said
Wow sir you have been a great mentor to me when it comes to flask. Thanks so much.
-
#15 Dy said
Hi Miguel , first of all, I must thank you for this great beginner walk-through! Its really useful for me!
However, I have one quick question, Dropzone.js did not return me with the error code "File is too large"
I got this error code instead, "server responded with 0 code." when I attempt to upload a over size file. Is it due to some missing packages I did not installed?
Thank you in advanced! -
#16 Miguel Grinberg said
@Dy: DropZone does not return the file is too large error, it just shows errors reported by the server. If you get a different error, then your server must be returning it, so debug your server to determine why it is returning a different error.
-
#17 Mukesh Kumar said
How can we test file uploads in pytest?
-
#18 Miguel Grinberg said
@Mukesh: the Flask test client can upload a file in a POST request. Here is an example: https://tutorials.technology/tutorials/Flask--How-to-Test-file-upload.html.
-
#19 hyunsoojeon said
What changes should I make if I want to see the updated list of photos under the upload form as soon as I upload a new photo?
-
#20 Miguel Grinberg said
@hyunsoojeon: isn't that what the example in this article does? What do you want to do different?
-
#21 perymerdeka said
i wanna ask you, how to get filename from file upload then save to database?, before that thanks this tutorial is easy to understand
-
#22 Miguel Grinberg said
@perymerdeka: See the section titled "Validating Filenames" above.
-
#23 Cauchymike said
Hello Miguel, your tutorial has been inspiring. I just have one little question. I am able to get users upload their profile picture locally because it's saved on my database. But whenever I try to deploy to heroku, this operation fails. I began to store my files on amazon s3, but I can't seem to find a way to get the specific path to a user's profile picture if I'm saving all the pictures in a particular bucket. My question is, if using the s3 bucket, how do I connect the users profile picture to their images on my bucket?
-
#24 Miguel Grinberg said
@Cauchymike: Serving files from S3 can be tricky if you try to do it by hand. I suggest you use the Flask-S3 extension.
-
#25 Abraham Francis said
Hey I was wondering on how you would go about adding an option to allow the user to pause uploads and downloads? Is this possible?


