Easy WebSockets with Flask and Gevent
Posted by
on underThis weekend I decided to take a short vacation from my book writing effort and spend time on a project I wanted to work on for a long time. The result of this effort is a brand new Flask extension that I think is pretty cool.
I'm happy to introduce Flask-SocketIO, a very easy to use extension that enables WebSocket communications in Flask applications.
What is WebSocket?
WebSocket is a new communication protocol introduced with HTML5, mainly to be implemented by web clients and servers, though it can also be implemented outside of the web.
Unlike HTTP connections, a WebSocket connection is a permanent, bi-directional communication channel between a client and the server, where either one can initiate an exchange. Once established, the connection remains available until one of the parties disconnects from it.
WebSocket connections are useful for games or web sites that need to display live information with very low latency. Before this protocol existed there were other much less efficient approaches to achieve the same result such as Comet.
The following web browsers support the WebSocket protocol:
- Chrome 14
- Safari 6
- Firefox 6
- Internet Explorer 10
What is SocketIO?
SocketIO is a cross-browser Javascript library that abstracts the client application from the actual transport protocol. For modern browsers the WebSocket protocol is used, but for older browsers that don't have WebSocket SocketIO emulates the connection using one of the older solutions, the best one available for each given client.
The important fact is that in all cases the application uses the same interface, the different transport mechanisms are abstracted behind a common API, so using SocketIO you can be pretty much sure that any browser out there will be able to connect to your application, and that for every browser the most efficient method available will be used.
What about Flask-Sockets?
A while ago Kenneth Reitz published Flask-Sockets, another extension for Flask that makes the use of WebSocket accessible to Flask applications.
The main difference between Flask-Sockets and Flask-SocketIO is that the former wraps the native WebSocket protocol (through the use of the gevent-websocket project), so it can only be used by the most modern browsers that have native support. Flask-SocketIO transparently downgrades itself for older browsers.
Another difference is that Flask-SocketIO implements the message passing protocol exposed by the SocketIO Javascript library. Flask-Sockets just implements the communication channel, what is sent on it is entirely up to the application.
Flask-SocketIO also creates an environment for event handlers that is close to that of regular view functions, including the creation of application and request contexts. There are some important exceptions to this explained in the documentation, however.
A Flask-SocketIO Server
Installation of Flask-SocketIO is very simple:
$ pip install flask-socketio
Below is an example Flask application that implements Flask-SocketIO:
from flask import Flask, render_template
from flask_socketio import SocketIO, emit

app = Flask(__name__)
app.config['SECRET_KEY'] = 'secret!'
socketio = SocketIO(app)

@app.route('/')
def index():
    return render_template('index.html')

@socketio.on('my event')
def test_message(message):
    emit('my response', {'data': message['data']})

@socketio.on('my broadcast event')
def test_message(message):
    emit('my response', {'data': message['data']}, broadcast=True)

@socketio.on('connect')
def test_connect():
    emit('my response', {'data': 'Connected'})

@socketio.on('disconnect')
def test_disconnect():
    print('Client disconnected')

if __name__ == '__main__':
    socketio.run(app)
The extension is initialized in the usual way, but to simplify the start up of the server a custom run() method is used instead of flask run or app.run(). This method starts the eventlet or gevent servers if they are installed. Using gunicorn with the eventlet or gevent workers should also work. The run() method takes optional host and port arguments, but by default it will listen on localhost:5000 like Flask's development web server.
The only traditional route in this application is /, which serves index.html, a web document that contains the client implementation of this example.
To receive WebSocket messages from the client the application defines event handlers using the socketio.on decorator.
The first argument to the decorator is the event name. Event names 'connect', 'disconnect', 'message' and 'json' are special events generated by SocketIO. Any other event names are considered custom events.
The 'connect' and 'disconnect' events are self-explanatory. The 'message' event delivers a payload of type string, and the 'json' and custom events deliver a JSON payload, in the form of a Python dictionary.
To send events a Flask server can use the send() and emit() functions provided by Flask-SocketIO. The send() function sends a standard message of string or JSON type to the client. The emit() function sends a message under a custom application-defined event name.
Messages are sent to the connected client by default, but when including the broadcast=True optional argument all clients connected to the namespace receive the message.
A SocketIO Client
Ready to try your hand at some Javascript? The index.html page used by the example server contains a little client application that uses jQuery and SocketIO. The relevant code is shown below:
$(document).ready(function(){
    var socket = io();
    socket.on('my response', function(msg) {
        $('#log').append('<p>Received: ' + msg.data + '</p>');
    });
    $('form#emit').submit(function(event) {
        socket.emit('my event', {data: $('#emit_data').val()});
        return false;
    });
    $('form#broadcast').submit(function(event) {
        socket.emit('my broadcast event', {data: $('#broadcast_data').val()});
        return false;
    });
});
The socket variable is initialized with a SocketIO connection to the server. If the Socket.IO server is hosted at a different URL than the HTTP server, then you can pass a connection URL as an argument to io().
The socket.on() syntax is used in the client side to define an event handler. In this example a custom event with name 'my response' is handled by adding the data attribute of the message payload to the contents of a page element with id log. This element is defined in the HTML portion of the page.
The next two blocks override the behavior of two form submit buttons so that instead of submitting a form over HTTP they trigger the execution of a callback function.
For the form with id emit the submit handler emits a message to the server with name 'my event' that includes a JSON payload with a data attribute set to the value of the text field in that form.
The second form, with id broadcast does the same thing, but sends the data under a different event name called 'my broadcast event'.
If you now go back to the server code you can review the handlers for these two custom events. For 'my event' the server just echoes the payload back to the client in a message sent under event name 'my response', which is handled by showing the payload in the page. The event named 'my broadcast event' does something similar, but instead of echoing back to the client alone it broadcasts the message to all connected clients, also under the 'my response' event.
You can view the complete HTML document in the GitHub repository.
Running the Example
To run this example you first need to download the code from GitHub. For this you have two options:
- Clone the repository with git
- Download the project as a zip file.
The example application is in the example directory, so cd to it to begin.
To keep your global Python interpreter clean it is a good idea to make a virtual environment:
$ virtualenv venv
$ . venv/bin/activate
Then you need to install the dependencies:
(venv) $ pip install -r requirements.txt
Finally you can run the application:
(venv) $ python app.py
Now open your web browser and navigate to http://localhost:5000 and you will get a page with two forms as shown in the following screenshot:
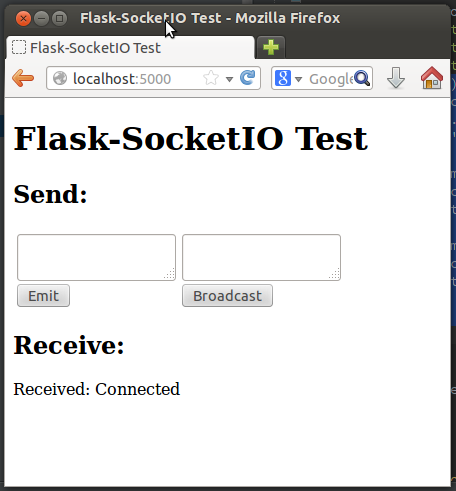
Any text you submit from any of the two text fields will be sent to the server over the SocketIO connection, and the server will echo it back to the client, which will append the message to the "Receive" part of the page, where you can already see the message sent by the 'connect' event handler from the server.
Things get much more interesting if you connect a second browser to the application. In my case I'm testing this with Firefox and Chrome, but any two browsers that you run on your machine will do. If you prefer to access the server from multiple machines you can do that too, but you first need to change the start up command to socketio.run(app, host='0.0.0.0') so that the server listens on the public network interface.
With two or more clients when you submit a text from the form on the left only the client that submitted the message gets the echoed response. If you submit from the form on the right the server broadcasts the message to all connected clients, so all get the reply.
If a client disconnects (for example if you close the browser window) the server will detect it a few seconds later and send a disconnect event to the application. The console will print a message to that effect.
Final Words
For a more complete description of this extension please read the documentation. If you want to make improvements to it feel free to fork it and then submit a pull request.
I hope you make cool applications with this extension. I can tell you that I had a lot of fun implementing this extension.
If you make something with it feel free to post links in the comments below.
Miguel
Become a Patron!
Hello, and thank you for visiting my blog! If you enjoyed this article, please consider supporting my work on this blog on Patreon!

-
#226 Pedro Baumann said
Hello Miguel,
as always, thanks for a brilliant job helping the community.I wanted to ask you for advice. I jave used Flask-socketio before with success, but now I need to use it to push updates from an API to a website. I can do that just fine if I serve the web from the same Flask app, but this website will be generated statically (with pelican) and will probabbly be on a diferent VPS.
So, my question is, how would you manage that? I have tried it in localhost, serving the static web from my local nginx and it doesn't find the endpoint, it doesn't matter if I use a global channel or one I created.
I was wondering if this was due to the fack that socketio upggrades the http request to a websocket one.
Any hints would be grealy welcomed!
-
#227 Miguel Grinberg said
@Pedro: I wonder if the problem is related to CORS (cross origin resource sharing). Have you implemented the CORS headers on your API?
-
#228 Vatsal said
ImportError: No module named greenlet ; when using gevent . Though I explicitly installed greenlet . I am using python 2.7.
-
#229 Miguel Grinberg said
@Vatsal: compare your packages against mine here: https://github.com/miguelgrinberg/Flask-SocketIO/blob/master/example/requirements.txt
-
#230 Saurabh Gandhi said
Hi Miguel,
Thank you so much for the library and the tutorial.
My question is how do I provide server to server communication from a Node JS server to Flask-SocketIO server.
The Node JS Server connects directly to the websocket of the Flask SocketIO server. Can you show me an example on how do I achieve this? -
#231 Saurabh Gandhi said
Also we are trying with 0.9.16 socket io js library. But we are unable to make the connection.
-
#232 Miguel Grinberg said
@Saurabh: you can't connect two servers, use the socket.io client on the node.js side. This used to work, but haven't tested it in a long time.
-
#233 Tom said
Hi Miguel,
Thanks for the post, exactly what I was looking for. I would like to send a message to all clients except the sender. You mentioned in an earlier post that filtering could be done on the client side. Is this still the only option or can it be taken care of server side?
Thanks,
Tom.
-
#234 Carlos Vida said
Thanks very much, Miguel. Your framework works flawlessly.
-
#235 Miguel Grinberg said
@Tom: I have not added the option to message everyone except the sender yet, so you need to filter the message that you do not want in the client.
-
#236 Rahul said
Hi Miguel. Thank you for the great examples you have. I am working on a demo that has both REST client calls and flask-socket.io. I have used flask for the REST implementation from your other example. I having trouble making both of them play together. How do I start the server so that both of them play together nicely. Also, I would like the server to run on the same port number for both socket-io and REST data access (preferably anything other than the default port number 5000). Thanks!
-
#237 Miguel Grinberg said
@Rahul: are the API and the socket.io routes interacting in any way? You shouldn't have any trouble having both in a single application. To set a different port number, pass a "port=<your-port>" as an argument to socketio.run().
-
#238 Hongyuan said
Hi Miguel,
Your example is really cool! But it seems that flask-socketio can only be used to send JSON or String data type. Is there a way of sending something else, like arraybuffer?
Thanks,
Hongyuan
-
#239 Miguel Grinberg said
@Hongyuan: you have to encode your binary data in a way that is valid for JSON. For example, you can send it as a list of numbers (each number is a byte), or you can also encode the binary data as a base64 string.
-
#240 deepanshu said
Is it possible to run multiple applications using multiple ports at same webpage through threading?
-
#241 Aditya said
Hey miguel,
One quesion - do you think there could be problems in using socketio for pages that communicate through regular old http?
I only need 1/3 of the pages in my flask app to use socketio, the rest send form data normally through http. Im just too lazy to change those pages ;). Still, I don't want my data to mess up if I'm sending http requests through socketio.
Great post, and thanks for making our lives easier yet again!
Aditya
-
#242 Miguel Grinberg said
@deepanshu: not sure exactly what you are trying to do. You can run multiple applications on different ports, with or without gevent. If you are asking about running those apps all in the same process in the server, then yes, you can, but why would you do that? It's a lot simpler to run the apps as separate processes.
-
#243 Miguel Grinberg said
@Aditya: The only thing to keep in mind is that when the browsers sends a regular HTTP request it will close any socket connections as it loads the new page. So any new page will have to reconnect. You can avoid this by using Ajax for your GET and POST requests.
-
#244 Fredrik said
Hey Miguel,
I've been using Flask-SocketIO for different projects with great success. I'm currently working on a new project where I hope to use Flask-SocketIO, the problem is that other project members would like to use python 3.
I know that gevent doesn't support python 3 yet, but my question to you is, how will Flask-SocketIO be developed in the future. Are you waiting for gevent to support python3? Will Flask-SocketIO be ported to use asyncio of python3?
I'm also curios if you can give an estimate on the effort needed to port Flask-SocketIO to python3? Since there is a fork of gevent that "works" I'm thinking about if there is a possibility to port it myself.
-
#245 Miguel Grinberg said
@Fredrik: there are a couple of problems that make the task of going to Python 3 pretty big. Gevent not working on Python 3 is a big problem, but also gevent-socketio hasn't been maintained in a while, and this project also needs to be ported to Python 3. Another issue with gevent-socketio is that it implements a very old version of the Socket.IO protocol, so on the client you are stuck using the 0.9.x libraries. Flask does not run on asyncio, maybe something can be done with eventlet which does run on Python 3.
The gevent for Python 3 fork did not work for me a while ago when I tested it. But if you can make it work, then the next step would be to port gevent-socketio and gevent-websocket. If you get that far, then porting Flask-SocketIO should take very little time.
-
#246 Shashank said
Hey Miguel,
I am having trouble deploying a project I created using flask-socketIO. I know the server needs to be either uWSGI or gunicorn. However the example code in the documentation for running gunicorn didn't work for me and the documentation says that currently it is not possible to run flask-socketIO on uWSGI. I am really knew to web development and working with WSGI so this might be a stupid question, but I have been trying to set up a websocket server and client for a couple days and currently I have the server running on the default flask server but I believe that does not support websockets. So I cant get the flask-socketIO application to run on a server that works with websockets. Any help solving this would be greatly appreciated.
Thanks,
Shashank -
#247 Miguel Grinberg said
@Shashank: As the documentation says, uWSGI does not work, but gunicorn does. The exact command line you need to use is shown in the docs. Sockets are not part of the WSGI spec, so they have to be handled on the side. For gunicorn there is a specific socketio server that does this. If you are using the Flask server, then you need to switch from app.run() to socket.run(), as indicated in the docs and examples.
-
#248 Vinit said
I have installed requirement.txt file using
$ sudo pip install -r requirement.txt
All the modules get installed properly but when running the application it gives error that ' No module name flask.ext.socketio'
and same error for all the other modules(gevent, Flask-SocketIO.etc.) -
#249 Miguel Grinberg said
@Vinit: check your requirements.txt file. Does it have Flask-SocketIO in it? If not, then run "pip install flask-socketio" and you'll be fine.
-
#250 James said
Hello Miguel,
Had a few questions on deployment of socketio.
1. Planning on using gunicorn on EC2. Each EC2 server will have gunicorn.
2. Behind the scenes will use redis pub sub to coordinate.
3. As I need to handle more requests will just scale horizontally by throwing more EC2 servers.
Let me know if you see any issues with this deployment.


