Add a WebSocket Route to your Flask 2.x Application
Posted by
on underThe WebSocket protocol was standardized 10 years ago (in 2011, can you believe it?) so I'm sure for many of it you does not need an introduction. But in case you are not familiar with it, WebSocket is an extension to the HTTP protocol that provides a permanent, bi-directional communication channel between a client and the server, where both sides can send and receive data in real time, free of the constraints of the request/response cycle of HTTP.
Flask, being a minimalist web framework, does not have WebSocket support built-in. The old Flask-Sockets extension, which has not been maintained in the last few years, provided support for this protocol. My own Flask-SocketIO extension has also been a favorite, but this is Socket.IO, which is a more complex protocol that combines WebSocket and HTTP.
The good news is that if you are using Flask 2 you now have a new extension (also created by myself) called Flask-Sock, which provides modern WebSocket support for your application. In this article I'm going to show you how to work with this extension.
This article was voted by my supporters on Patreon. Would you like to support my work, and as a thank you be able to vote on my future articles and also have access to a chat room where I hang out? Become a Patron!
Introducing the Flask-Sock Extension
The Flask-Sock extension is installed with pip:
pip install flask-sock
The extension is added to your Flask application by creating a Sock() instance. If you have a global app object, you can use the direct initialization method:
sock = Sock(app)
If instead you create your application instance in a factory function, then the two-step initialization method works as well:
sock = Sock()

def create_app():
    app = Flask(__name__)
    sock.init_app(app)
The sock instance has a route decorator, that works pretty much like Flask's own, but it adds the WebSocket protocol handshake so that the route can speak WebSocket instead of HTTP. Here is a simple server that echoes back to the client anything it sends:
@sock.route('/echo')
def echo(ws):
    while True:
        data = ws.receive()
        ws.send(data)
The ws object that is passed to the route is the actual WebSocket connection, which the function can use to exchange information with the client through the send() and receive() methods. It goes without saying that when multiple clients are connected at the same time, each gets its own ws object, and the communication between the server and each client is private.
Looking at the code example above, the main difference between a Flask route and a WebSocket route is that the WebSocket function is designed to run for a long time. WebSocket connections often last for as long as the user has a page in the browser open, so it may be several minutes or even hours. Unlike standard HTTP routes, your WebSocket handler will very likely have to be implemented with a loop, so that it remains active for as long as it is needed. The WebSocket function is not expected to return a response, the Flask-Sock extension takes care of generating the response as required by the WebSocket protocol.
How do you end a WebSocket connection? The most common situation is that the user navigates away from the page that created the connection, At this point the browser will close the WebSocket, and from then on the ws.receive() and ws.send() methods are going to raise a ConnectionClosed exception, which is automatically handled by the Flask-Sock extension to end the route gracefully. You can catch this exception in the route to perform custom cleanup if necessary.
A second way to end the WebSocket connection occurs when the server initiates the close. To do this, the WebSocket route needs to call ws.close(), or alternatively, just exit the function.
The ws.route decorator is fully integrated with Flask, and in fact, it uses the app.route decorator internally. In particular, all these things work:
- Variable components in the URL. If your URL has variables, the
wsargument must be included before those variables in the function definition. - Additional decorators. You can add any decorators that are designed to work with Flask routes, such as Flask-Login's
login_requiredand any others. - Before and after request handlers. These are invoked for WebSocket routes as well.
current_app,request,gandsession. These work the same as in Flask routes, with one exception regarding thesessionvariable, explained below.
An important feature of HTTP that is not available in WebSocket is the ability to set cookies. In HTTP, cookies are set in the response headers. WebSocket does not use an HTTP response, so it is not possible to set a cookie when the WebSocket connection ends. This means that changes made to the session object in the WebSocket handler function are not saved.
Running your Flask + WebSocket server
To run your WebSocket enabled web server during development, just run your application in the way you normally do. Both the flask run and app.run() methods of running the server are compatible with Flask-Sock.
To run your Flask + WebSocket server in production you can use Gunicorn. You will normally want to enable multithreading, because as discussed earlier, a WebSocket route will run for a long time, and without threads each WebSocket connection would consume an entire worker. The following example creates a Gunicorn server with four workers, each using 100 threads, allowing a maximum of 400 active WebSocket connections (though you will always want to leave some threads available to handle other HTTP requests):
gunicorn -b 0.0.0.0:5000 --workers 4 --threads 100 module:app
If you prefer to use a greenlet based asynchronous web server, Flask-Sock is also compatible with eventlet and gevent. The documentation has all the details. The uWSGI web server is currently not supported.
A Complete Example
Let's have a look at a complete example. Here is the Flask application code:
from flask import Flask, render_template
from flask_sock import Sock

app = Flask(__name__)
sock = Sock(app)


@app.route('/')
def index():
    return render_template('index.html')


@sock.route('/echo')
def echo(sock):
    while True:
        data = sock.receive()
        sock.send(data)
This is based in the echo server code shown above. The application has a root URL that returns the index.html client page, and a /echo route that implements a WebSocket echo endpoint.
Here is the index.html page, which you have to save in a templates subdirectory:
<!doctype html>
<html>
  <head>
    <title>Flask-Sock Demo</title>
  </head>
  <body>
    <h1>Flask-Sock Demo</h1>
    <div id="log"></div>
    <br>
    <form id="form">
      <label for="text">Input: </label>
      <input type="text" id="text" autofocus>
    </form>
    <script>
      const log = (text, color) => {
        document.getElementById('log').innerHTML += `<span style="color: ${color}">${text}</span><br>`;
      };

      const socket = new WebSocket('ws://' + location.host + '/echo');
      socket.addEventListener('message', ev => {
        log('<<< ' + ev.data, 'blue');
      });
      document.getElementById('form').onsubmit = ev => {
        ev.preventDefault();
        const textField = document.getElementById('text');
        log('>>> ' + textField.value, 'red');
        socket.send(textField.value);
        textField.value = '';
      };
    </script>
  </body>
</html>
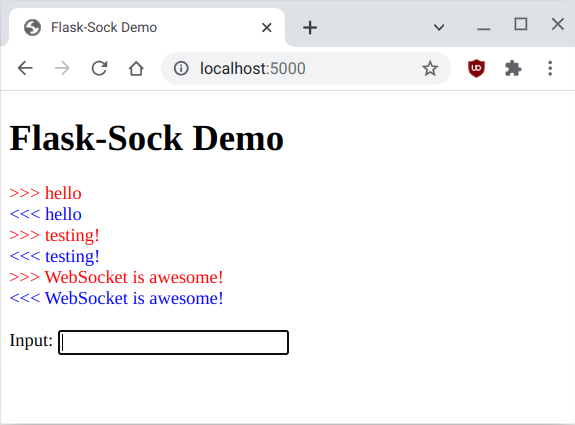
The HTML page includes a <script> section with the client-side logic. The log() auxiliary function writes a string to the page, using the given color. This is used to write outgoing data in red, and incoming data in blue, as you can see in the screenshot below:
The application uses the WebSocket class provided by the browser to make a connection to the /echo endpoint. It then installs a listener for the message event, which fires whenever the server sends data through the connection. The handler prints the data to the page. The page has a form with an <input> element that accepts text from the user. A second event handler is defined on the submit event for the form. The handler for this event logs the text entered by the user to the page, and then writes it to the WebSocket connection, using its send() method.
To try out this application, save the Python file as app.py and the HTML file as index.html in a templates subdirectory. Then run the application with flask run. Connect with your browser at the http://localhost:5000 URL to use the application.
What Flask-Sock Doesn't Do
Flask-Sock is designed to be a simple extension to implement WebSocket communication between a client and the server. It is not a goal of this extension to implement advanced workflows involving the broadcasting of messages to all or to subsets of clients. Your application can implement this if desired, but if you need something of this complexity you may be better off using Flask-SocketIO. I have written an article about it too!
Become a Patron!
Hello, and thank you for visiting my blog! If you enjoyed this article, please consider supporting my work on this blog on Patreon!

-
#51 Brent T said
Flask-Sock looks great. A few questions as I am new to flask (WSGI) development. I am modifying an app that runs in Werkzeug (Flask development web server). This meets my needs right now. I now want to replace client-side polling with a server push solution. For this I will add a ws client connection in javascript and a server-side @sock.route(). Socket.IO, etc. seem overkill for my solution.
For Flask-Sock, Is it as simple as replacing the client javascript setTimeout() call with a timed loop inside a route decorated with @sock.route() to ws.send(data) across a websocket connection back to the client.
//Current app polls a flask route from js using setTimeout()
//route from Flask app that is getting polled by js client
@app.route("/state")
def get_state():
return self.sim_controller.get_state_dumps()// to use Flask-Sock push solution
//1. client established ws connection in JS
//2. add @sock.route('/state')@sock.route('/state')
def state(ws):
while True:
- """TODO: replace existing JS setTimeout call with a Python timer """
ws.send(self.sim_controller.get_state_dumps())make sense, or am I missing something in my understanding?
Thanks -
#52 Miguel Grinberg said
@Brent: Yes, your plans seem correct to me.
-
#53 Tim said
Hey Miguel,
is there a way to access the websocket ID and use it later to send a message to a connected client outside the context of the response handler?
also, does this have support for wss? if so, how can I enable it?
thankyou
-
#54 Miguel Grinberg said
@Tim: WebSocket does not have "IDs". What you can do is store the "ws" instance that you receive in the WebSocket route and use it from somewhere else when you need to send a message to the client. You could, in fact, keep a data structure with all the WebSocket instances of your clients, maybe indexed by user ID and then find the correct instance to use when you want to address a specific user.
Using wss is really not the concern of this package, that is something that is resolved in the web server. So as long as you configure wss in your web server (or reverse proxy server if you prefer) you should be fine.
-
#55 Jacob Rhoads said
Your content is professional, appropriately low-level without being deep in the mud, and exactly what I've been searching for since I started working on this flask project. I used to think Flask was just this simple micro-framework that couldn't handle much, however, since I inherited this massive 16k+ database program that I'm required to 'update' and provide O&M on (built years ago, not by me), I've been amazed with Blueprints ability to take flask projects to an enterprise-level of functionality.
Thanks for what you do, it is very much needed.
-
#56 Fotios said
Hi Miguel, thank you for the Flask-Sock. I have a question, how can I pass a variable to the "def echo(sock)" I am really confused about it. I want to use only the sock.send() and call the id from the DB and pass it to sock.send().
@app.route('/', methods=['GET', 'POST'])
def index():
if request.method == 'POST':
.......
return render_template('echo.html')
return render_template('index.html')@sock.route('/echo<int:id>'')
def echo(sock):
qry = db.session.query(User).filter(User.id==id)
........
sock.send(qry..) -
#57 Miguel Grinberg said
@Fotios: Try this:
@sock.route('/echo/<int:id>') def echo(sock, id): # ... -
#58 Fotios said
Thanks you Miguel. Sorry my question was not clear but I found a solution, in a case someone else is looking on how to pass a variable from jinja to JavaScript when it is calling the socket.
.... var myid = {{ yourvariable|safe }}; const log = (text, color) => { document.getElementById('log').innerHTML += `<span style="color: ${color}">${text}</span><br>`; }; const socket = new WebSocket('ws://' + location.host + '/echo?id=' + myid); .... -
#59 Thomas Fung said
I am using a Ubuntu server v22, running Flask with Waitress. "pip install flask-sock" works good, except the deprecated textract warning. However in the code, "from flask_sock import Sock" gives an error, flask_sock could not be resolved. I tried to reinstall everything with no avail. Any idea what went wrong? I use a virtual python environment.
Thanks a lot,
-
#60 Miguel Grinberg said
@Thomas: I'm not sure what the problem is, but in any case, waitress does not have support for WebSocket, so nothing you do with the web server is going to work. I would suggest you switch to Gunicorn.
-
#61 goldman said
please can this socket be used for TCP/IP servers that communicate BLE devices?
-
#62 Miguel Grinberg said
@goldman: this is WebSocket, the web protocol. Higher level than a TCP/IP socket.
-
#63 gavrinjo said
Hi Miguel,
Is it possible to use websocket to simulate sensor data and plot it with charts.js
I found something similar on YT with temperature simulation, i ask because i have a project with six sensors simulations. -
#64 Miguel Grinberg said
@gavrinjo: websocket is a transport mechanism, it can be used to send data from client to server or from server to client. That's all it is. What you do with the data is entirely up to you.
-
#65 Tri said
Hi Miguel,
Is there anyway to update the new data while sending to ESP32. Here is my code:@sock.route('/test') def order(ws): while(1): ws.send(session.get('data', None)) @app.route('/test', methods=['POST']) def test(): output = request.get_json() imgdata = base64.b64decode(output) img = Image.open(io.BytesIO(imgdata)) opencv_img = cv2.cvtColor(np.array(img), cv2.COLOR_BGR2RGB) opencv_img = cv2.flip(opencv_img, 1) opencv_img.flags.writeable = False results = hands.process(opencv_img) opencv_img.flags.writeable = True result = None if results.multi_hand_landmarks: hands_keypoint = [] if len(results.multi_handedness) == 2: for hand in results.multi_hand_landmarks: hand = convert_landmark_list(hand) hands_keypoint += hand if (results.multi_handedness[0].classification[0].label != results.multi_handedness[1].classification[0].label): if (results.multi_handedness[0].classification[0].label == 'Right'): slice = int(len(hands_keypoint) / 2) hands_keypoint = hands_keypoint[slice:] + hands_keypoint[:slice] result = Trimodel.predict([hands_keypoint]) else: for side in results.multi_handedness: if side.classification[0].label == 'Left': for hand in results.multi_hand_landmarks: hand = convert_landmark_list(hand) hands_keypoint += hand hands_keypoint += [0.0] * 63 else: hands_keypoint += [0.0] * 63 for hand in results.multi_hand_landmarks: hand = convert_landmark_list(hand) hands_keypoint += hand result = Trimodel.predict([hands_keypoint]) if result is not None: result = str(hand_signals[result[0]]) session['data'] = result return jsonify(result) result = "Not found" session['data'] = result return jsonify("Not found")I want to get data from result variable and send it to my esp32. I don't figure the way to update the data and it keep sending the first value.
Thank you and really appreciate to your work! -
#66 Miguel Grinberg said
@Tri: the session is stored in a cookie. Unfortunately WebSocket does not have any visibility into the cookies that the client's browser has, so it will not see updates. You can use a database to store the value.


