Easy WebSockets with Flask and Gevent
Posted by
on underThis weekend I decided to take a short vacation from my book writing effort and spend time on a project I wanted to work on for a long time. The result of this effort is a brand new Flask extension that I think is pretty cool.
I'm happy to introduce Flask-SocketIO, a very easy to use extension that enables WebSocket communications in Flask applications.
What is WebSocket?
WebSocket is a new communication protocol introduced with HTML5, mainly to be implemented by web clients and servers, though it can also be implemented outside of the web.
Unlike HTTP connections, a WebSocket connection is a permanent, bi-directional communication channel between a client and the server, where either one can initiate an exchange. Once established, the connection remains available until one of the parties disconnects from it.
WebSocket connections are useful for games or web sites that need to display live information with very low latency. Before this protocol existed there were other much less efficient approaches to achieve the same result such as Comet.
The following web browsers support the WebSocket protocol:
- Chrome 14
- Safari 6
- Firefox 6
- Internet Explorer 10
What is SocketIO?
SocketIO is a cross-browser Javascript library that abstracts the client application from the actual transport protocol. For modern browsers the WebSocket protocol is used, but for older browsers that don't have WebSocket SocketIO emulates the connection using one of the older solutions, the best one available for each given client.
The important fact is that in all cases the application uses the same interface, the different transport mechanisms are abstracted behind a common API, so using SocketIO you can be pretty much sure that any browser out there will be able to connect to your application, and that for every browser the most efficient method available will be used.
What about Flask-Sockets?
A while ago Kenneth Reitz published Flask-Sockets, another extension for Flask that makes the use of WebSocket accessible to Flask applications.
The main difference between Flask-Sockets and Flask-SocketIO is that the former wraps the native WebSocket protocol (through the use of the gevent-websocket project), so it can only be used by the most modern browsers that have native support. Flask-SocketIO transparently downgrades itself for older browsers.
Another difference is that Flask-SocketIO implements the message passing protocol exposed by the SocketIO Javascript library. Flask-Sockets just implements the communication channel, what is sent on it is entirely up to the application.
Flask-SocketIO also creates an environment for event handlers that is close to that of regular view functions, including the creation of application and request contexts. There are some important exceptions to this explained in the documentation, however.
A Flask-SocketIO Server
Installation of Flask-SocketIO is very simple:
$ pip install flask-socketio
Below is an example Flask application that implements Flask-SocketIO:
from flask import Flask, render_template
from flask_socketio import SocketIO, emit

app = Flask(__name__)
app.config['SECRET_KEY'] = 'secret!'
socketio = SocketIO(app)

@app.route('/')
def index():
    return render_template('index.html')

@socketio.on('my event')
def test_message(message):
    emit('my response', {'data': message['data']})

@socketio.on('my broadcast event')
def test_message(message):
    emit('my response', {'data': message['data']}, broadcast=True)

@socketio.on('connect')
def test_connect():
    emit('my response', {'data': 'Connected'})

@socketio.on('disconnect')
def test_disconnect():
    print('Client disconnected')

if __name__ == '__main__':
    socketio.run(app)
The extension is initialized in the usual way, but to simplify the start up of the server a custom run() method is used instead of flask run or app.run(). This method starts the eventlet or gevent servers if they are installed. Using gunicorn with the eventlet or gevent workers should also work. The run() method takes optional host and port arguments, but by default it will listen on localhost:5000 like Flask's development web server.
The only traditional route in this application is /, which serves index.html, a web document that contains the client implementation of this example.
To receive WebSocket messages from the client the application defines event handlers using the socketio.on decorator.
The first argument to the decorator is the event name. Event names 'connect', 'disconnect', 'message' and 'json' are special events generated by SocketIO. Any other event names are considered custom events.
The 'connect' and 'disconnect' events are self-explanatory. The 'message' event delivers a payload of type string, and the 'json' and custom events deliver a JSON payload, in the form of a Python dictionary.
To send events a Flask server can use the send() and emit() functions provided by Flask-SocketIO. The send() function sends a standard message of string or JSON type to the client. The emit() function sends a message under a custom application-defined event name.
Messages are sent to the connected client by default, but when including the broadcast=True optional argument all clients connected to the namespace receive the message.
A SocketIO Client
Ready to try your hand at some Javascript? The index.html page used by the example server contains a little client application that uses jQuery and SocketIO. The relevant code is shown below:
$(document).ready(function(){
    var socket = io();
    socket.on('my response', function(msg) {
        $('#log').append('<p>Received: ' + msg.data + '</p>');
    });
    $('form#emit').submit(function(event) {
        socket.emit('my event', {data: $('#emit_data').val()});
        return false;
    });
    $('form#broadcast').submit(function(event) {
        socket.emit('my broadcast event', {data: $('#broadcast_data').val()});
        return false;
    });
});
The socket variable is initialized with a SocketIO connection to the server. If the Socket.IO server is hosted at a different URL than the HTTP server, then you can pass a connection URL as an argument to io().
The socket.on() syntax is used in the client side to define an event handler. In this example a custom event with name 'my response' is handled by adding the data attribute of the message payload to the contents of a page element with id log. This element is defined in the HTML portion of the page.
The next two blocks override the behavior of two form submit buttons so that instead of submitting a form over HTTP they trigger the execution of a callback function.
For the form with id emit the submit handler emits a message to the server with name 'my event' that includes a JSON payload with a data attribute set to the value of the text field in that form.
The second form, with id broadcast does the same thing, but sends the data under a different event name called 'my broadcast event'.
If you now go back to the server code you can review the handlers for these two custom events. For 'my event' the server just echoes the payload back to the client in a message sent under event name 'my response', which is handled by showing the payload in the page. The event named 'my broadcast event' does something similar, but instead of echoing back to the client alone it broadcasts the message to all connected clients, also under the 'my response' event.
You can view the complete HTML document in the GitHub repository.
Running the Example
To run this example you first need to download the code from GitHub. For this you have two options:
- Clone the repository with git
- Download the project as a zip file.
The example application is in the example directory, so cd to it to begin.
To keep your global Python interpreter clean it is a good idea to make a virtual environment:
$ virtualenv venv
$ . venv/bin/activate
Then you need to install the dependencies:
(venv) $ pip install -r requirements.txt
Finally you can run the application:
(venv) $ python app.py
Now open your web browser and navigate to http://localhost:5000 and you will get a page with two forms as shown in the following screenshot:
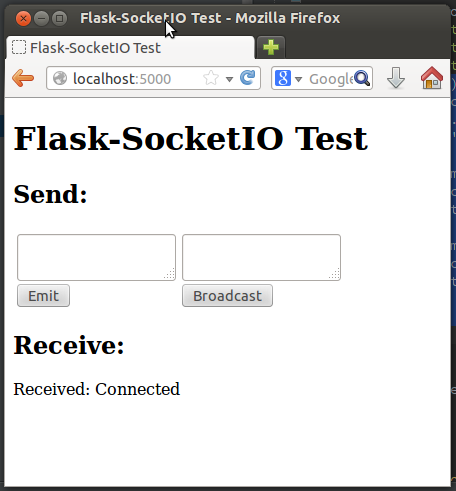
Any text you submit from any of the two text fields will be sent to the server over the SocketIO connection, and the server will echo it back to the client, which will append the message to the "Receive" part of the page, where you can already see the message sent by the 'connect' event handler from the server.
Things get much more interesting if you connect a second browser to the application. In my case I'm testing this with Firefox and Chrome, but any two browsers that you run on your machine will do. If you prefer to access the server from multiple machines you can do that too, but you first need to change the start up command to socketio.run(app, host='0.0.0.0') so that the server listens on the public network interface.
With two or more clients when you submit a text from the form on the left only the client that submitted the message gets the echoed response. If you submit from the form on the right the server broadcasts the message to all connected clients, so all get the reply.
If a client disconnects (for example if you close the browser window) the server will detect it a few seconds later and send a disconnect event to the application. The console will print a message to that effect.
Final Words
For a more complete description of this extension please read the documentation. If you want to make improvements to it feel free to fork it and then submit a pull request.
I hope you make cool applications with this extension. I can tell you that I had a lot of fun implementing this extension.
If you make something with it feel free to post links in the comments below.
Miguel
Become a Patron!
Hello, and thank you for visiting my blog! If you enjoyed this article, please consider supporting my work on this blog on Patreon!

-
#26 Miguel Grinberg said
@Roo: Very interesting project!
To integrate my socket example with your app you may want to take my "index.html" file and put it in place of yours, so that your view function returns my template. Then modify the template to also render your user list. I think with these simple changes you will have your user list and at the same time the sockets will be up.
You will then need a server side task that listens to the buttons from your device. This task will have to know what the user is, and this is currently sort of hacky. One way you can do this is to save "request.namespace" in the connect event (you may need to save a list here if you have more than one client). The button task can then send stuff to the client(s) by calling emit() on the namespace object.
I hope this helps!
-
#27 W.Michael DePeel said
Hi Miguel,
I got it working, though the emit function used during my flask route's function seems to be grabbing the request object from the flask route and trying to grab the namespace from that, and failing.
I worked around this and confirmed this behavior by setting request.namespace = the socket's namespace(a global variable for now).
At first I thought, maybe I'm importing the wrong emit, but my import line for socketio is as follows:
from flask.ext.socketio import SocketIO, emit
I see the function emit doesn't have any self reference, but the SocketIO's emit method does, though that shouldn't do anything. I'll post the related code up, there's a good chance I'm doing something wrong! : )
https://gist.github.com/trugate/9393775
I hope that's clear enough...still learning a lot here.
-
#28 Miguel Grinberg said
@W.Michael: Yes, that is expected. The "request.namespace" attribute is not available to regular Flask routes, it is only available in a socket handler. I probably didn't explain this well in my previous comment. What you need to do is save this object when you get the socket connect event, so that then your regular Flask route can have access to it. One option is to have a global dictionary with the key set to the user id and the value set to the namespace. The connect events writes a new entry to that dict, and the disconnect event removes it. Then from a regular Flask route you can locate the namespace for a given user and do "namespace.emit(...)". The global emit() function will not work, as you noticed, that one is designed to find the namespace on its own, and only works within the context of a socket handler.
-
#29 W.Michael DePeel said
Great, now I get it, namespace.emit(etc). That's what I needed. With that, I don't feel so dirty : ) Thanks a bunch!
-
#30 Chris said
Hello Miguel,
is it possible to access to your websocket methods from another thread within a python application?
Regards
Chris -
#31 Miguel Grinberg said
@Chris: Yes, that should be fine, the other thread can send a message to an individual client or a broadcast. If you use the latest version of my extension any thread can broadcast messages using socketio.emit() or socketio.send(), where "socketio" is the instance of class SocketIO. To send to an individual client you have to store the namespace object for it in the connect event. This object also has emit() and event() methods.
-
#32 Bruce said
Looks great! Flask has been in need of better support/integration for realtime/asynchronous apps. I've had my eye on Socket.IO for some time. Looking forward to trying this out.
-
#33 Chris said
It seems that I have some problem with gevent's monkey.patch_all() - it's causing my server to terminate without an error as soon as I run it. If I comment it out, it just hangs on "Restarting with reloader". Any idea why this is? I'm using Python 2.7 on win7.
-
#34 Paul Aphivantrakul said
Hi Miguel,
Thank you for creating this extension. I am able to use this on localhost. However, when I try to implement it on my webserver, it seems that I can emit messages from the html file, but I am not receiving any messaages back from the views.py. I think the problem is that I am using wsgi to run Flask on the webserver, and socketio.run(app) is not being used. I am not sure though. Thank you for your help.
-
#35 Miguel Grinberg said
@Chris: Are you using the precompiled binaries on Windows? That's the safest route. Another alternative is to use Cygwin with its own Python, which works great for me.
-
#36 Miguel Grinberg said
@Paul: Your web server needs to support gevent and websocket. Both gunicorn and uwsgi can be configured to do this. Which server are you using?
-
#37 Paul Aphivantrakul said
Hi Miguel. Thank you for your reply. I am using an Apache webserver. I am using a LAMP configuration for my server.
-
#38 Miguel Grinberg said
@Paul: how does Apache communicate with your Flask app?
-
#39 Paul Aphivantrakul said
I was able to get my Flask application running on the Apache server by using a wsgi file. Here is a link to my wsgi file:
https://gist.github.com/aphivantrakul/9531687Thank you.
-
#40 Miguel Grinberg said
@Paul: okay, so you are using the mod_wsgi module in Apache. Unfortunately I believe mod_wsgi knows nothing about gevent, so you will not be able to configure it to talk to your gevent based application in the correct way. A secondary problem is to make Apache handle the websocket communication, for which you will need mod_websocket, but really the first issue is a deal breaker.
I recommend that you look into using gunicorn or uwsgi as your web server, the multi-threaded or multi-process models of Apache are not a good fit for a gevent based application.
-
#41 Paul Aphivantrakul said
Thank you very much for your help Miguel.
-
#42 Will Gunadi said
I had to fight the urge to immediately use this extension in my application. Then it dawned on me that the more likely usage scenario for this extension is to be deployed as a stand-alone WS server, where other flask-based applications register as clients (using the SocketIO JS lib).
-
#43 Miguel Grinberg said
@Will: I don't understand what you mean. Your application is really hosting two servers, the regular one and the websocket one. There are no other flask-based applications, a client gets the HTML pages using regular routes and then from its Javascript code connects to the websocket routes.
-
#44 Chris Arndt said
I recently built a small Webapp with Flask and gevent-socketio, which I found very easy to get started with. (In the end I replaced Flask with Bottle, because I wasn't really using any of Flask's extra features.) How does Flask-SocketIO compare to gevent-socketio?
One thing I find unfortunate about SocketIO is that current Python implementations (including yours) tie you to Python 2 because of their use of gevent. Do you think it would be feasible to implement Websockets/SocketIO on top of the new asyncio library in the upcoming Python 3.4?
-
#45 Miguel Grinberg said
@Chris: Flask-SocketIO is just a wrapper around gevent-socketio. If you are familiar with Flask's app.route() style of routing then writing socketio events should feel more familiar than having to write a Namespace class.
Fully agree with you on the lack of Python 3 support. My understanding is that gevent will soon run on Python 3, there is a fork already working. After that happens I'm sure it won't take a lot to port gevent-socketio and gevent-websocket.
The asyncio library could be a good alternative, but there is going to be some work in porting the socketio server to it. Not sure if that project exists yet.
-
#46 frank finch said
hello, nice extension, i wanna ask that if i need a stream notification push system and chatroom app running at the same time. what should i do with this ext? can i pass the customized namespace to socketio.on?
-
#47 Miguel Grinberg said
@frank: this extension enables you to build your own apps with websocket. It allows your server to send or receive messages from clients.
-
#48 Andrew Williams said
Hi Miguel,
When I try to run this from within a virtual env, with a custom ip/port specified ('0.0.0.0',80) I get a permission denied error. Runs fine if I don't specify and use port 5000. Any ideas?
Best
- Andrew
-
#49 Miguel Grinberg said
@Andrew: yes, regular users do not have access to ports below 1024. You have to be in an admin account to use those.
-
#50 Tom T. said
Hey, thanks for this nice extension!
I ask myself how you would start such an app using gunicorn?


