Add a WebSocket Route to your Flask 2.x Application
Posted by
on underThe WebSocket protocol was standardized 10 years ago (in 2011, can you believe it?) so I'm sure for many of it you does not need an introduction. But in case you are not familiar with it, WebSocket is an extension to the HTTP protocol that provides a permanent, bi-directional communication channel between a client and the server, where both sides can send and receive data in real time, free of the constraints of the request/response cycle of HTTP.
Flask, being a minimalist web framework, does not have WebSocket support built-in. The old Flask-Sockets extension, which has not been maintained in the last few years, provided support for this protocol. My own Flask-SocketIO extension has also been a favorite, but this is Socket.IO, which is a more complex protocol that combines WebSocket and HTTP.
The good news is that if you are using Flask 2 you now have a new extension (also created by myself) called Flask-Sock, which provides modern WebSocket support for your application. In this article I'm going to show you how to work with this extension.
This article was voted by my supporters on Patreon. Would you like to support my work, and as a thank you be able to vote on my future articles and also have access to a chat room where I hang out? Become a Patron!
Introducing the Flask-Sock Extension
The Flask-Sock extension is installed with pip:
pip install flask-sock
The extension is added to your Flask application by creating a Sock() instance. If you have a global app object, you can use the direct initialization method:
sock = Sock(app)
If instead you create your application instance in a factory function, then the two-step initialization method works as well:
sock = Sock()

def create_app():
    app = Flask(__name__)
    sock.init_app(app)
The sock instance has a route decorator, that works pretty much like Flask's own, but it adds the WebSocket protocol handshake so that the route can speak WebSocket instead of HTTP. Here is a simple server that echoes back to the client anything it sends:
@sock.route('/echo')
def echo(ws):
    while True:
        data = ws.receive()
        ws.send(data)
The ws object that is passed to the route is the actual WebSocket connection, which the function can use to exchange information with the client through the send() and receive() methods. It goes without saying that when multiple clients are connected at the same time, each gets its own ws object, and the communication between the server and each client is private.
Looking at the code example above, the main difference between a Flask route and a WebSocket route is that the WebSocket function is designed to run for a long time. WebSocket connections often last for as long as the user has a page in the browser open, so it may be several minutes or even hours. Unlike standard HTTP routes, your WebSocket handler will very likely have to be implemented with a loop, so that it remains active for as long as it is needed. The WebSocket function is not expected to return a response, the Flask-Sock extension takes care of generating the response as required by the WebSocket protocol.
How do you end a WebSocket connection? The most common situation is that the user navigates away from the page that created the connection, At this point the browser will close the WebSocket, and from then on the ws.receive() and ws.send() methods are going to raise a ConnectionClosed exception, which is automatically handled by the Flask-Sock extension to end the route gracefully. You can catch this exception in the route to perform custom cleanup if necessary.
A second way to end the WebSocket connection occurs when the server initiates the close. To do this, the WebSocket route needs to call ws.close(), or alternatively, just exit the function.
The ws.route decorator is fully integrated with Flask, and in fact, it uses the app.route decorator internally. In particular, all these things work:
- Variable components in the URL. If your URL has variables, the
wsargument must be included before those variables in the function definition. - Additional decorators. You can add any decorators that are designed to work with Flask routes, such as Flask-Login's
login_requiredand any others. - Before and after request handlers. These are invoked for WebSocket routes as well.
current_app,request,gandsession. These work the same as in Flask routes, with one exception regarding thesessionvariable, explained below.
An important feature of HTTP that is not available in WebSocket is the ability to set cookies. In HTTP, cookies are set in the response headers. WebSocket does not use an HTTP response, so it is not possible to set a cookie when the WebSocket connection ends. This means that changes made to the session object in the WebSocket handler function are not saved.
Running your Flask + WebSocket server
To run your WebSocket enabled web server during development, just run your application in the way you normally do. Both the flask run and app.run() methods of running the server are compatible with Flask-Sock.
To run your Flask + WebSocket server in production you can use Gunicorn. You will normally want to enable multithreading, because as discussed earlier, a WebSocket route will run for a long time, and without threads each WebSocket connection would consume an entire worker. The following example creates a Gunicorn server with four workers, each using 100 threads, allowing a maximum of 400 active WebSocket connections (though you will always want to leave some threads available to handle other HTTP requests):
gunicorn -b 0.0.0.0:5000 --workers 4 --threads 100 module:app
If you prefer to use a greenlet based asynchronous web server, Flask-Sock is also compatible with eventlet and gevent. The documentation has all the details. The uWSGI web server is currently not supported.
A Complete Example
Let's have a look at a complete example. Here is the Flask application code:
from flask import Flask, render_template
from flask_sock import Sock

app = Flask(__name__)
sock = Sock(app)


@app.route('/')
def index():
    return render_template('index.html')


@sock.route('/echo')
def echo(sock):
    while True:
        data = sock.receive()
        sock.send(data)
This is based in the echo server code shown above. The application has a root URL that returns the index.html client page, and a /echo route that implements a WebSocket echo endpoint.
Here is the index.html page, which you have to save in a templates subdirectory:
<!doctype html>
<html>
  <head>
    <title>Flask-Sock Demo</title>
  </head>
  <body>
    <h1>Flask-Sock Demo</h1>
    <div id="log"></div>
    <br>
    <form id="form">
      <label for="text">Input: </label>
      <input type="text" id="text" autofocus>
    </form>
    <script>
      const log = (text, color) => {
        document.getElementById('log').innerHTML += `<span style="color: ${color}">${text}</span><br>`;
      };

      const socket = new WebSocket('ws://' + location.host + '/echo');
      socket.addEventListener('message', ev => {
        log('<<< ' + ev.data, 'blue');
      });
      document.getElementById('form').onsubmit = ev => {
        ev.preventDefault();
        const textField = document.getElementById('text');
        log('>>> ' + textField.value, 'red');
        socket.send(textField.value);
        textField.value = '';
      };
    </script>
  </body>
</html>
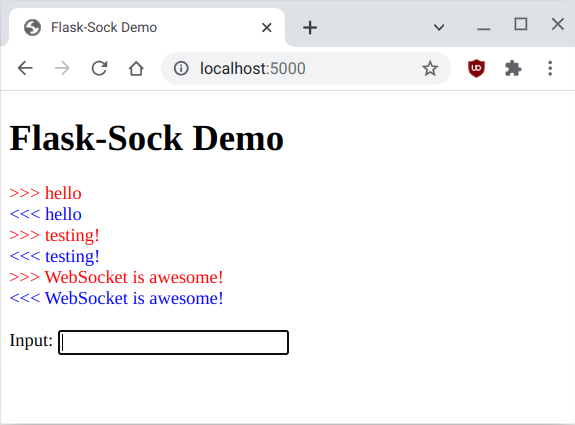
The HTML page includes a <script> section with the client-side logic. The log() auxiliary function writes a string to the page, using the given color. This is used to write outgoing data in red, and incoming data in blue, as you can see in the screenshot below:
The application uses the WebSocket class provided by the browser to make a connection to the /echo endpoint. It then installs a listener for the message event, which fires whenever the server sends data through the connection. The handler prints the data to the page. The page has a form with an <input> element that accepts text from the user. A second event handler is defined on the submit event for the form. The handler for this event logs the text entered by the user to the page, and then writes it to the WebSocket connection, using its send() method.
To try out this application, save the Python file as app.py and the HTML file as index.html in a templates subdirectory. Then run the application with flask run. Connect with your browser at the http://localhost:5000 URL to use the application.
What Flask-Sock Doesn't Do
Flask-Sock is designed to be a simple extension to implement WebSocket communication between a client and the server. It is not a goal of this extension to implement advanced workflows involving the broadcasting of messages to all or to subsets of clients. Your application can implement this if desired, but if you need something of this complexity you may be better off using Flask-SocketIO. I have written an article about it too!
Become a Patron!
Hello, and thank you for visiting my blog! If you enjoyed this article, please consider supporting my work on this blog on Patreon!

-
#1 Imran said
Great article, thanks. Is there a particular reason uWSGI is not supported right now?
-
#2 Miguel Grinberg said
@Imran: Yes. It has a weird WebSocket implementation, and overall I find uWSGI very difficult to configure and use, so it is a maintenance burden to support it.
-
#3 Matt said
Hi Miguel,
I'm trying to add this into your Mega Tutorial app but I keep getting the following error, what am missing?
ValueError: The name '__flask_sock' is already registered for a different blueprint. Use 'name=' to provide a unique name.thanks again
-
#4 Miguel Grinberg said
@Matt: Impossible to tell you for sure, but from the error my best guess is that you are registering the Flask-Sock extension twice.
-
#5 Kenneth said
I upgraded to Flask 2.0.1 and Werkzeug got bumped up to 2.0.2, which resulted in ImportError: cannot import name 'url_encode' from 'werkzeug'. Downgrading Werkzeug to 0.16.0 then caused ImportError: cannot import name 'ContextVar' from 'werkzeug.local'. Thanks!
-
#6 Miguel Grinberg said
@Kenneth: You can't use Flask 2 with Werkzeug 1, both needs to be upgraded at the same time. Your only option is to fix the import error for
url_encode, or if this happens on an installed package, then upgrade that package as well. -
#7 Paul said
Miguel,
I am having trouble running your demo program. I created a virtual environment. I am running Python 3.7.3. I installed flask 2.0. I installed flask-sock. I have Werkzueg 2.0.2.
If I try to run the program from IDLE3 or the Python 3 interpreter, I get an error - 'no module named 'flask_sock'
If I list the modules in my python environment, there is no flask_sock module. If I run pip freeze, it shows flask-sock==0.4.0If I run the program by $ FLASK_APP=wsdemo.py flask run
the program works fine.What am I missing?
Thanks -
#8 Miguel Grinberg said
@Paul: probably your IDLE instance is not running inside the same virtualenv in which you installed these packages.
-
#9 Paul McDonald said
Miguel,
I have the demo working now with IDLE3 - thanks.
However, what I really want to do is that once the WebSocket is active, the Flask route code watches a GPIO pin. Once the GPIO pin goes LOW, I want to end the WebSocket connection and launch a different html file.
When my Flask code sees the GPIO pin go LOW, i tried
sock.close()
return render_template('newpage.html')it doesn't work.
Is there a way to do what I want?
Thanks in advance
Paul -
#10 Miguel Grinberg said
@Paul: you have to design your solution within the constraints of the HTTP and WebSocket protocols. To end a WebSocket connection from the server, you can just return from the WebSocket route. Launching a different page is not really possible from the server, the client decides what page to load. Maybe you can making the client load a new page when the WebSocket connection ends. This is possible using JavaScript in the client.
-
#11 Andrew said
Hi Miguel,
I have implemented this solution & it works perfectly!, nice.
I have then altered the script within the html page to listen to a stream from an outside source which is then displayed on the page & then I send this data back to your flask-sock route '/echo'.
This is where I really need the data to analyse the stream's contents and take action. Seems an odd way to do it but ... I also need a flask app route '/webhook' to accept data from another outside source. I'm new to python (but programming since about 12yrs old / 53 yrs now) so excuse the crude solution. I looked at asyncio & threading but none seemed to fit very well or I'm just too new to python. Initially I had the stream & also a '/webhook' route, within the app.py but soon realised that I couldn't listen to the stream & accept 'POST' requests at the same time.What I have created out of your solution works but it's crude & a bit Frankenstein'ish :)
Is there a better way to eliminate the need for a web page & have the app.py contain the stream & also accept a payload via 'POST' '/webhook' route?
Hope this make some sense.Anyway, appreciate the work you have done !. Thanks Andrew.
-
#12 Miguel Grinberg said
@Andrew: you can use a Python websocket client if you prefer to not use the browser in your solution. There are a few available.
-
#13 Lukas said
I don't quite understand how to make this a chat app for 2 users. Can I ask for some advice?
-
#14 Miguel Grinberg said
@Lukas: WebSocket is a transport mechanism, it has nothing to do with chat. If you want to implement chat functionality, you need the server to maintain two WebSocket connections with the two participants. When one sends something to the server, you send it on the other websocket to the other client.
-
#15 Lewis Housten said
Could you give some examples of this would be used in a real life application? I don't mean examples of code just ideas. I'm assuming it would mostly be used to grab an update from the backend?
Thanks for the tutorial, it worked perfectly. You're really helping me to understand sockets (something I've struggled to understand properly).
-
#16 Miguel Grinberg said
@Lewis: A good example would be for the server to alert the user of notifications by pushing them to the browser.
-
#17 Julian said
Hi Miguel,
I was wondering if Flask-Sock has a built in functionality for the server to send messages to the client without first receiving a request from the client? I have been using Flask-SocketIO for this functionality with the socketio.emit() function, but I need to find an alternative as the set python version on the device I'm creating this software for is 3.5, and Flask-SocketIO requires 3.6+.
Thank you,
Julian
-
-
#19 Amine said
Hi Miguel, what are you using for the client side in this example? I'm new to websockets, and i've seen many use cases of Socket-IO client side, but mostly with Flask-Socket-IO in the backend as it can emit a websocket object. However with Flask-sock, i'm not sure how my code would look like on the frontend. ( I'm using Vue JS ).
-
#20 Miguel Grinberg said
@Amine: Yes, this is lower level. Wtih Flask-Sock you need to use a WebSocket client, Socket.IO would not work. All web browsers have support for WebSocket natively, you do not need to install anything. See this tutorial, for example.
-
#21 Julian said
Hi Miguel,
Thank you for your response! I can't seem to find the documentation for how I would send a message to the client from the server without being prompted first. With Flask-Socketio, all I needed to do was send a socketio.emit function, and I could do that from anywhere, but it seems to me like the only place I can send a message to the client is within the flask-sock callback functions. Could you please point me in the right direction to where I should look for how to do this?
Best
Julian
-
#22 Miguel Grinberg said
@Julian: To send a message to a client you just need access to the websocket object that was passed to the handler function that belongs to that client. When the function is invoked you can store this object in a global dictionary or list, so that the object can be accessed by any other part of your application to send messages.
-
#23 Julian said
@Miguel: Does Flask-Sock require Python3.6+? I need to make my software compatible with python3.5. I saw on PyPi that Flask-Sock requires 3.6+ and I wanted to confirm with you.
-
#24 Miguel Grinberg said
@Julian: I don't test Python 3.5 with this extension, so I don't really know if it works or not. It is not my goal to support such an old release.
-
#25 Amine said
Hi Miguel, quick followup on Julian's question, in other words, the object ( called ws in my case which is the websocket object ) which is a parameter in the socket route. I should make it global, and then i can use it anywhere in the app. We're still talking server-side, right? To be more precise, in my case, i have a cron job running that updates a dataframe that is stored in memory everytime a new data is inserted in the database. I want to push a notification to the client everytime my dataframe is updated. Is this doable in flask-sock?


